How to set up Context7 MCP in Visual Studio Code

This guide shows how you can set up Context7 MCP in your Visual Studio Code IDE (VS Code)
Preparation
First of all, you'll need to update VS Code to version 1.105.1 or higher. To check your version, go to Help -> About.
If you used a .deb file to install VS Code, just run these commands in the terminal to install updates:
sudo apt update
sudo apt install code
Before opening VS Code, we need to get the Context7 API key. For this, go to https://context7.com/dashboard, create a new account, and copy the API key.
Setup
Now we can proceed with the setup:
-
After opening VS Code, go to the extensions tab, where you'll see the new
MCP SERVERStab. Click onEnable MCP Servers Marketplace.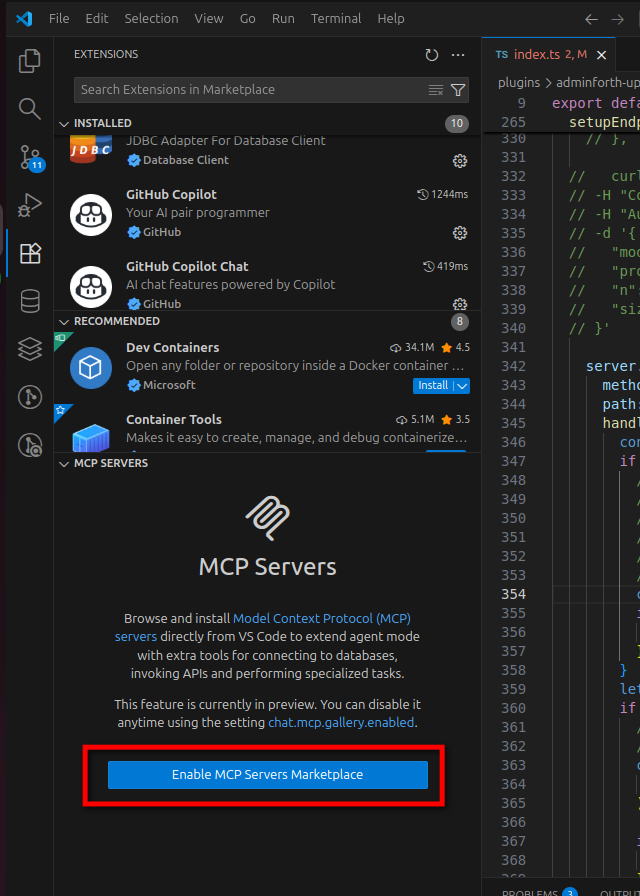
-
Find Context7 in the list and press
Install: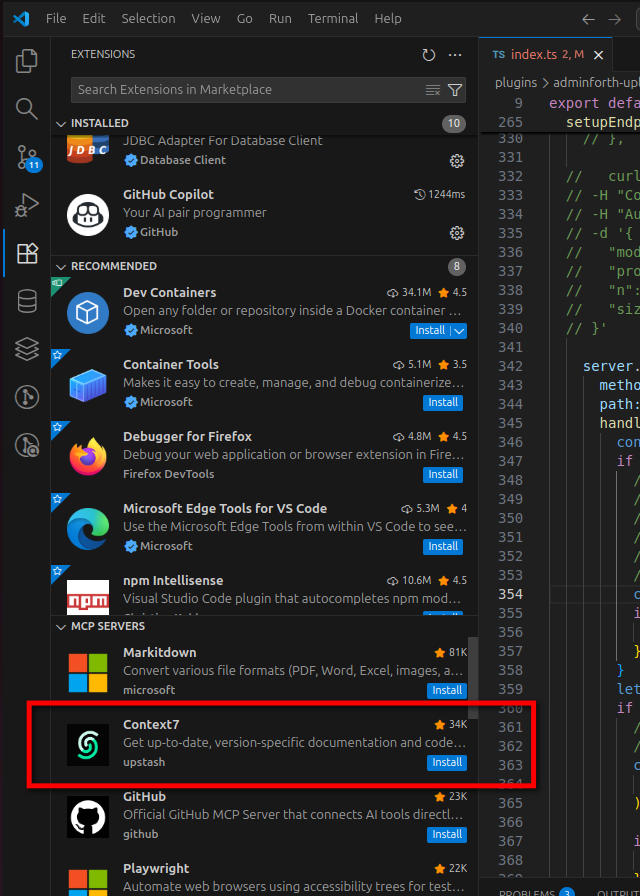
-
Go to
Show Configuration JSON: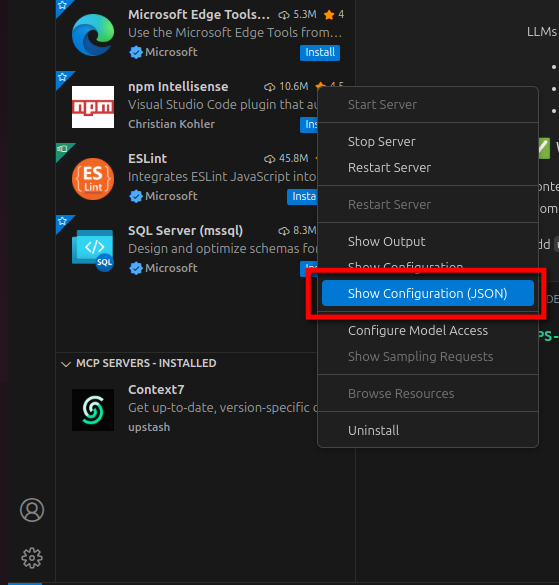
-
Click
Edit: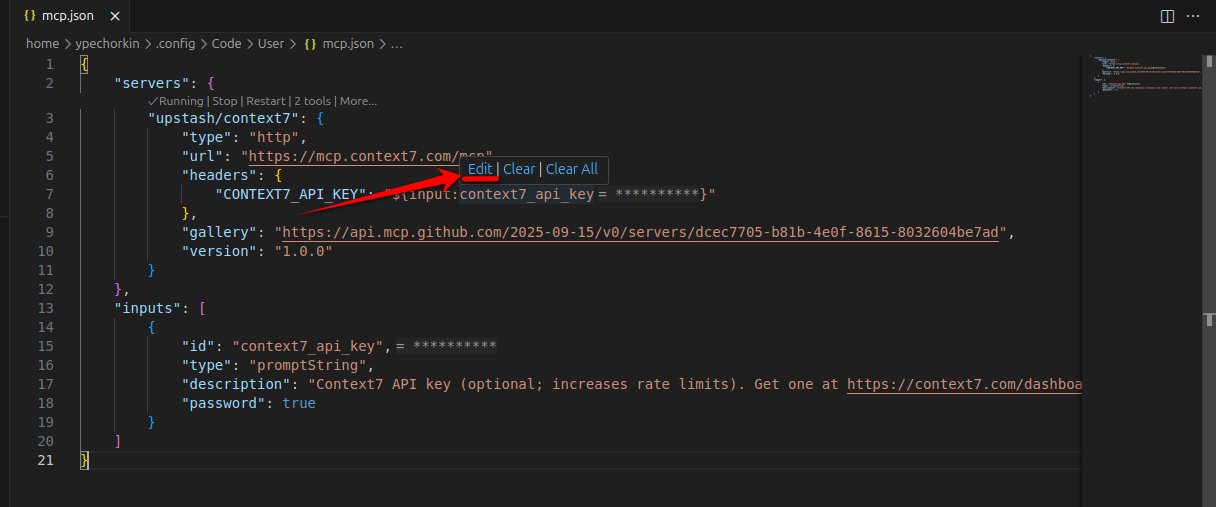
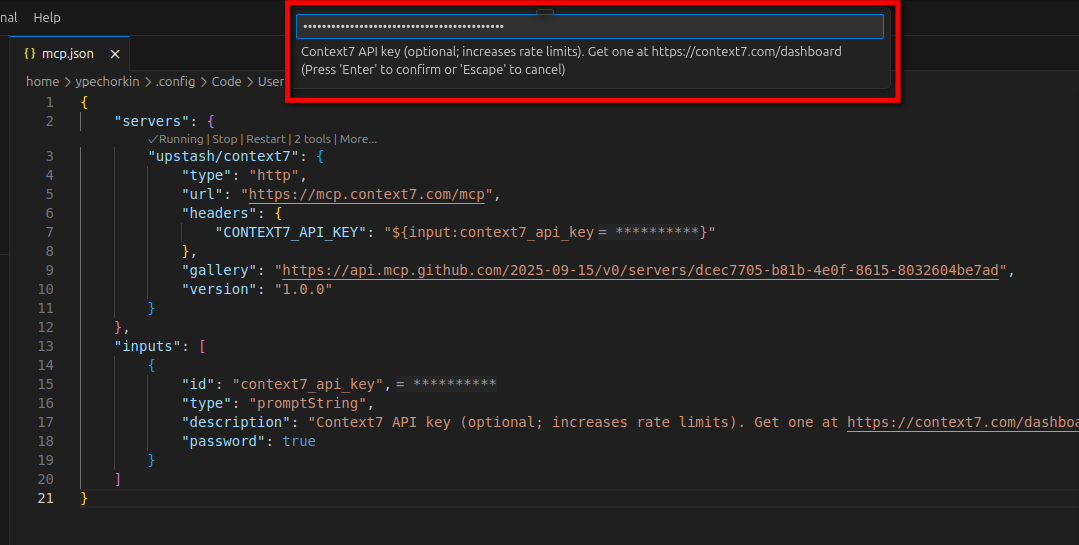
-
Insert your API key:
The installation is complete. You can now use it.
Example: Installation of the Bulk-ai-flow Plugin
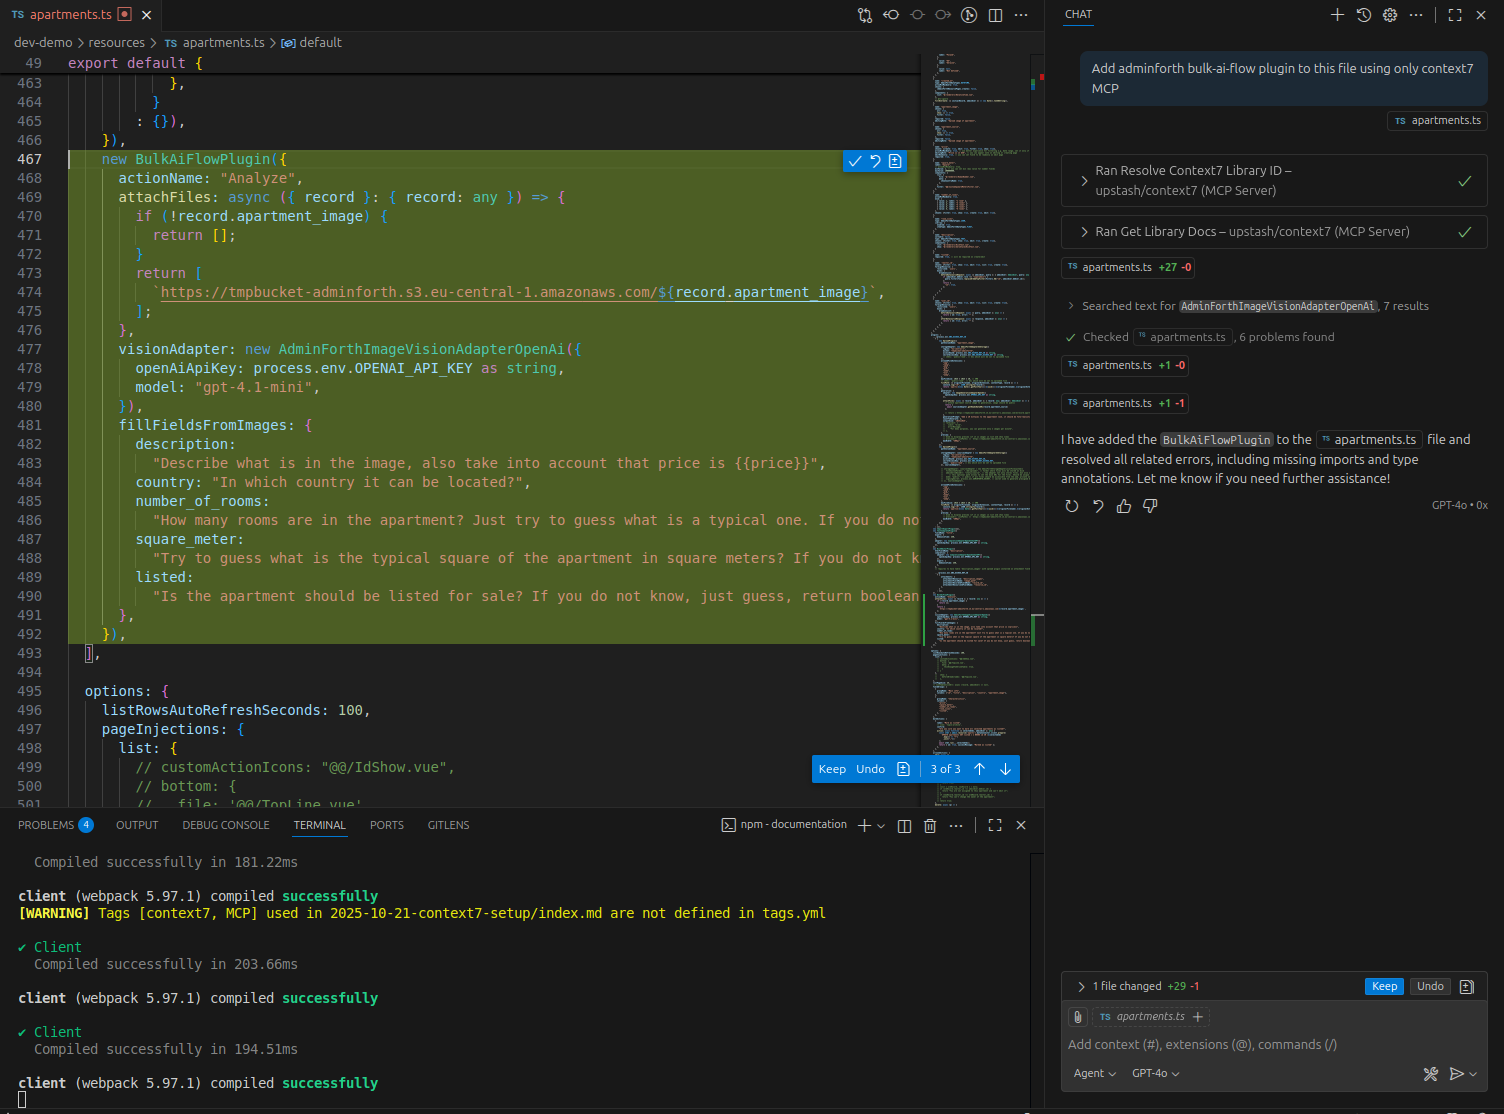
Here is an example prompt you can use to add the adminforth bulk-ai-flow plugin:
Prompt:
Add adminforth bulk-ai-flow plugin to this file using Context7 MCP
Generated Code:
Result:
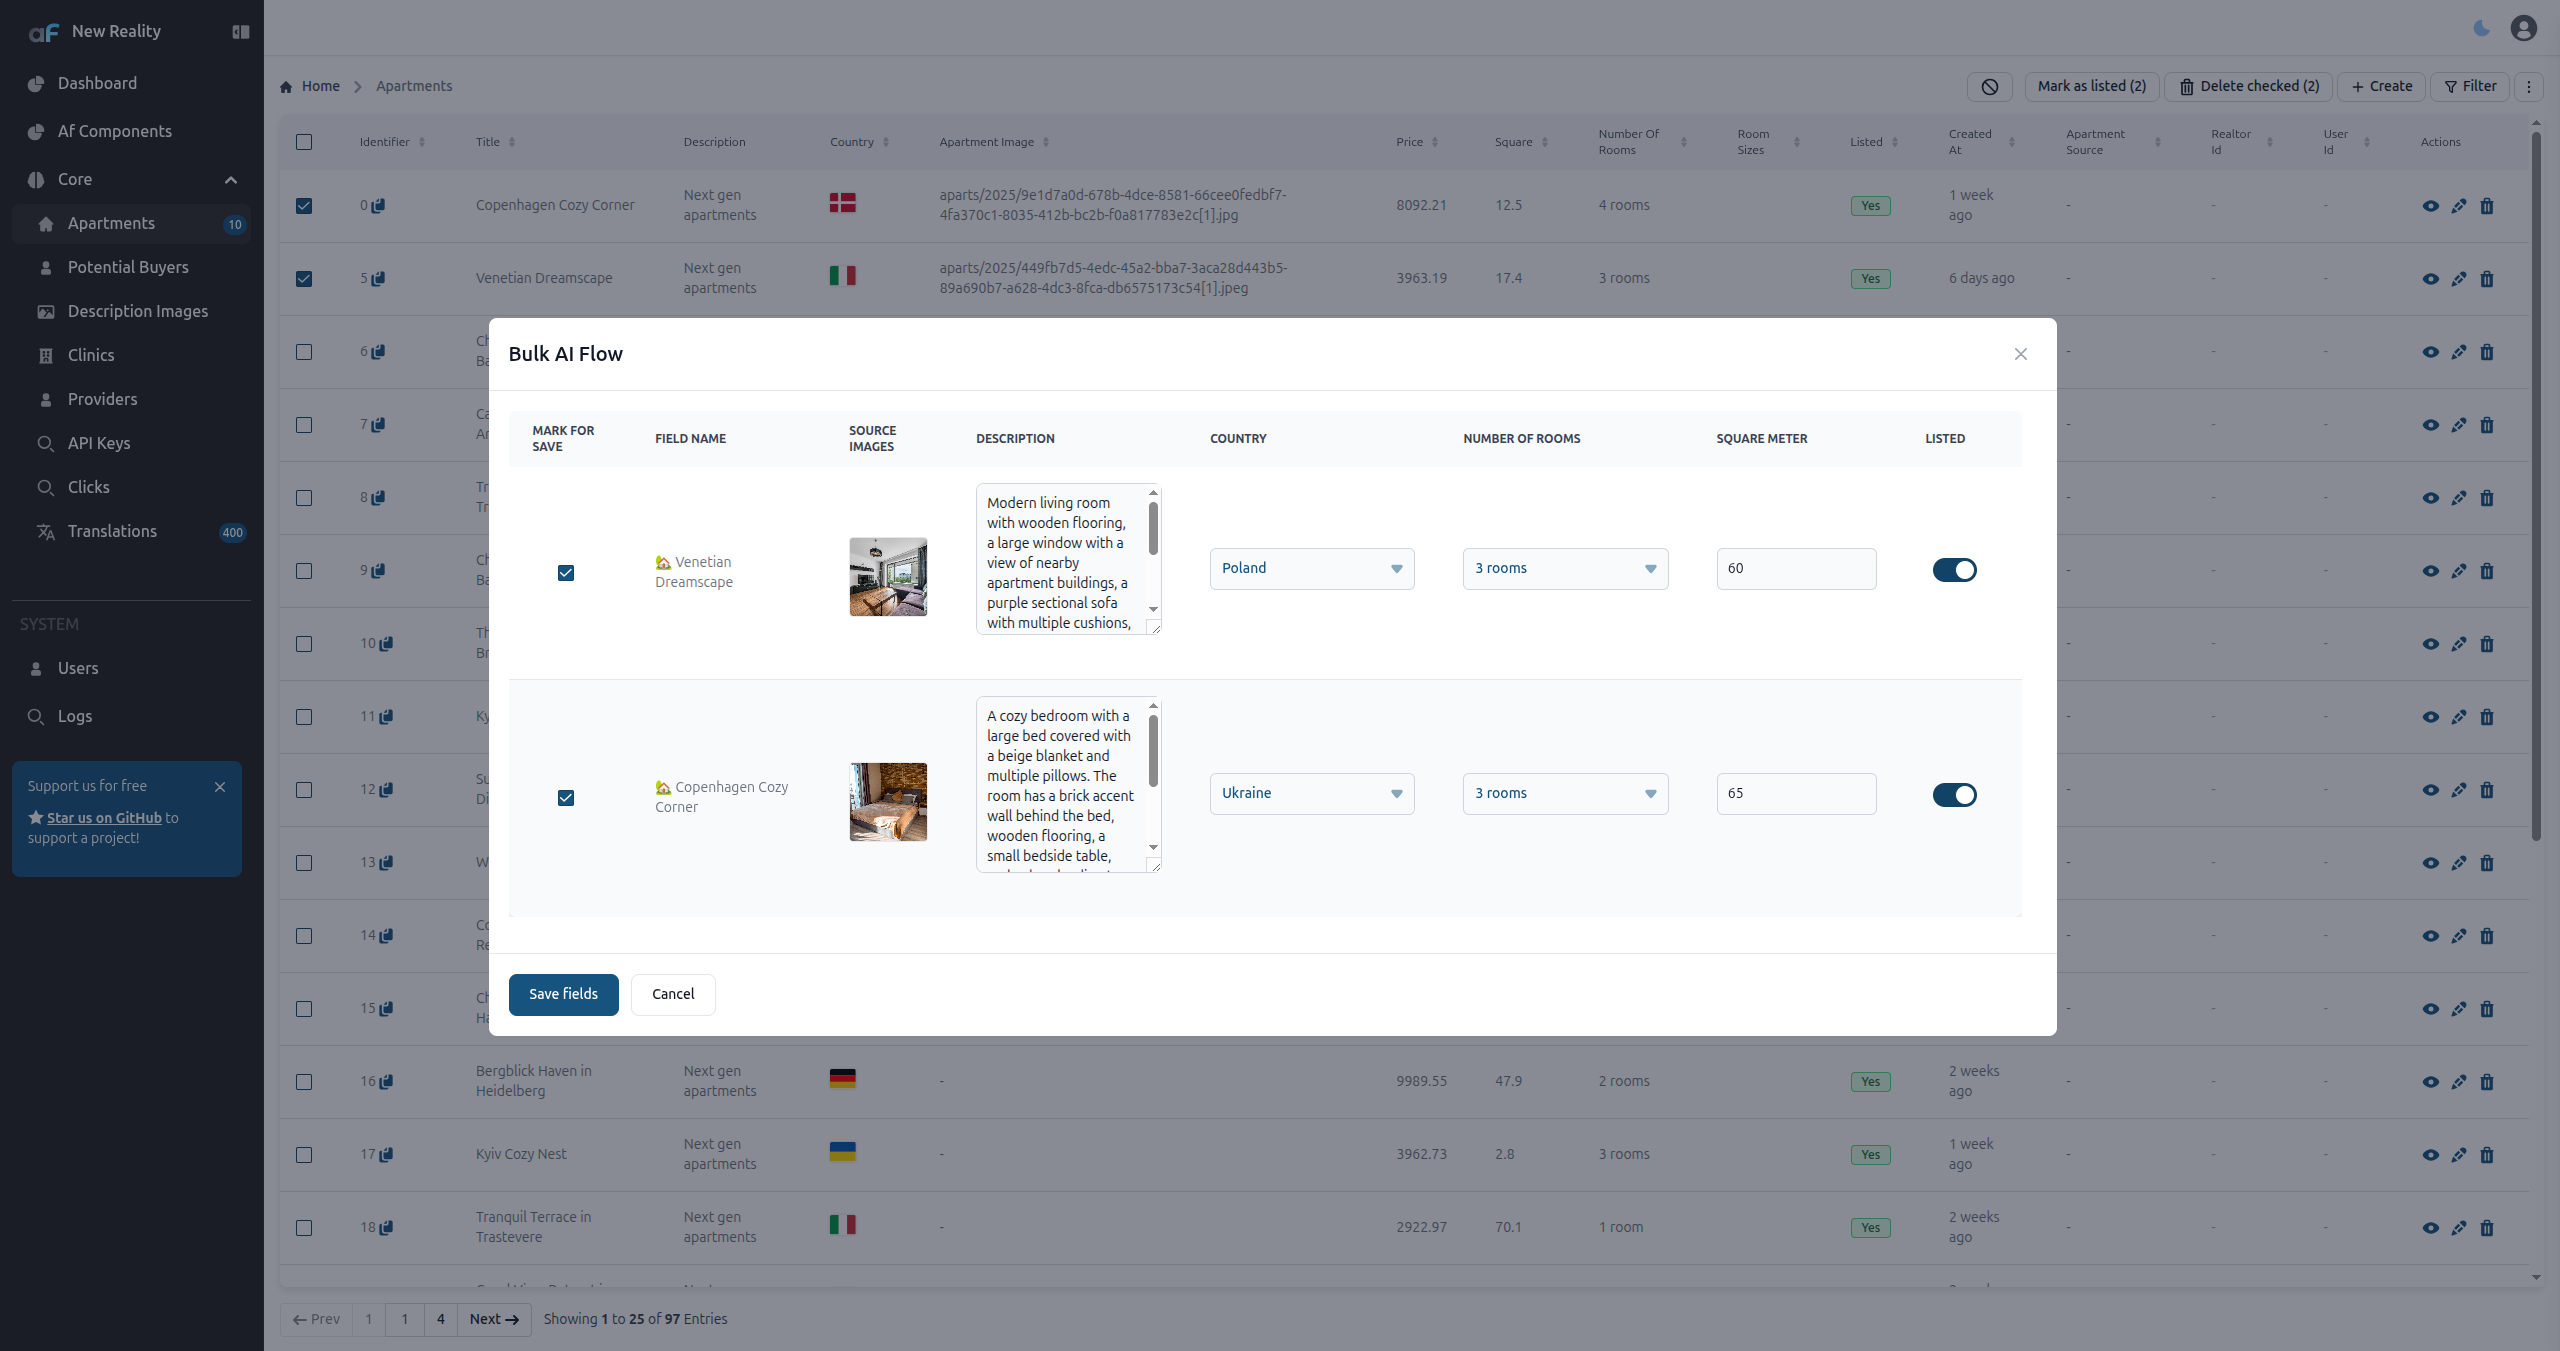
As we can see, the generation works really well.
Tips
If you don’t want to add use context7 to every prompt, you can define a simple rule in your MCP client's rule section.
If you're using github copilot, you can:
- In the root of your repository, create the .github directory if it does not already exist.
- create a file named
.github/copilot-instructions.md - Inside of new file add:
Always use context7 when I need code generation, setup or configuration steps, or
library/API documentation. This means you should automatically use the Context7 MCP
tools to resolve library id and get library docs without me having to explicitly ask.