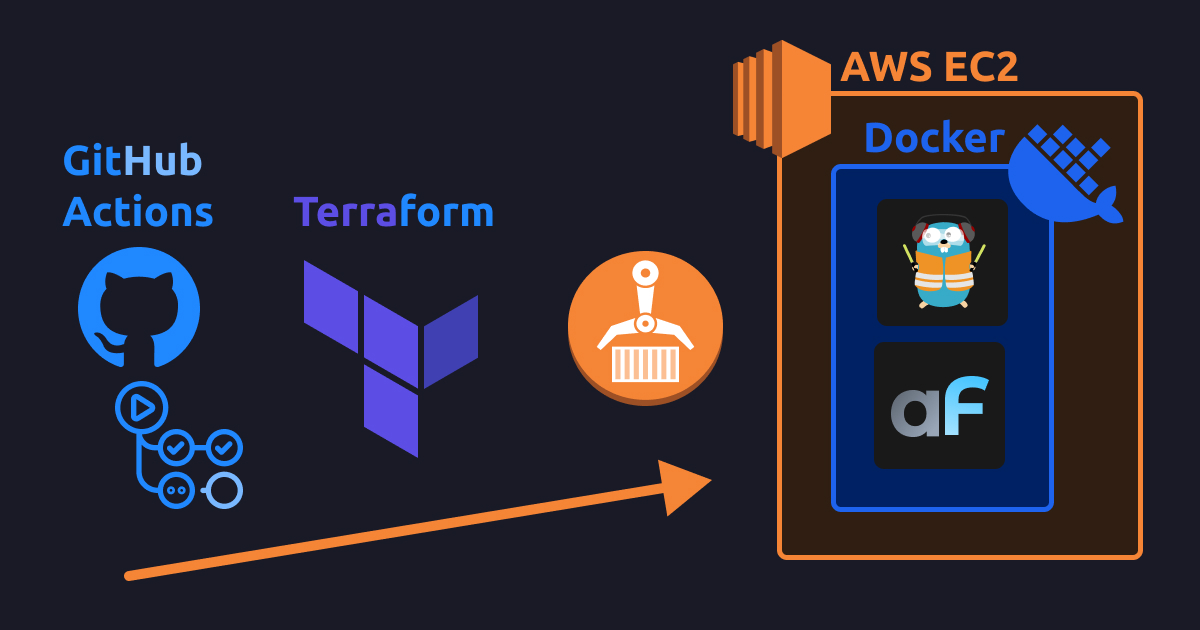
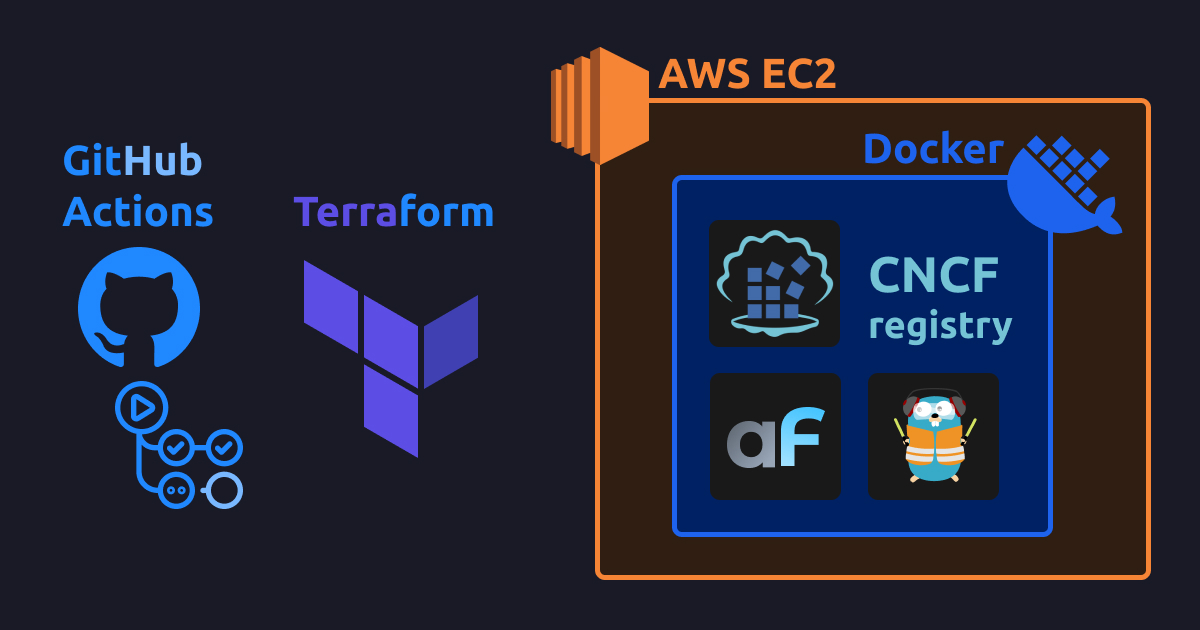
Backup database to AWS Glacier

· 2 min read
Ivan Borshcho
Maintainer of AdminForth

Every reliable system requires a backup strategy.

If you have no own backup infrastructure, here can suggest a small docker container that will help you to backup your database to AWS Glacier.

As a base guide we will use a previous blog post about deploying adminforth infrastructure.

First we need to allocate a new bucket in AWS S3 with modifying terraform configuration:

deploy/main.tf
resource "aws_s3_bucket" "backup_bucket" {
bucket = "${local.app_name}-backups"
}

resource "aws_s3_bucket_lifecycle_configuration" "backup_bucket" {
bucket = aws_s3_bucket.backup_bucket.bucket

rule {
id = "glacier-immediate"
status = "Enabled"

transition {
days = 0
storage_class = "GLACIER"
}
}
}

resource "aws_s3_bucket_server_side_encryption_configuration" "backup_bucket" {
bucket = aws_s3_bucket.backup_bucket.bucket

rule {
apply_server_side_encryption_by_default {
sse_algorithm = "AES256"
}
}
}

resource "aws_iam_user" "backup_user" {
name = "${local.app_name}-backup-user"
}

resource "aws_iam_access_key" "backup_user_key" {
user = aws_iam_user.backup_user.name
}

resource "aws_iam_user_policy" "backup_user_policy" {
name = "${local.app_name}-backup-policy"
user = aws_iam_user.backup_user.name

policy = jsonencode({
Version = "2012-10-17"
Statement = [
{
Effect = "Allow"
Action = [
"s3:PutObject",
"s3:GetObject",
"s3:DeleteObject",
"s3:ListBucket"
]
Resource = [
aws_s3_bucket.backup_bucket.arn,
"${aws_s3_bucket.backup_bucket.arn}/*"
]
}
]
})
}

Also add a section to main.tf to output the new bucket name and credentials:

deploy/main.tf
      "docker system prune -f",
# "docker buildx prune -f --filter 'type!=exec.cachemount'",
"cd /home/ubuntu/app/deploy",
"echo 'AWS_BACKUP_ACCESS_KEY=${aws_iam_access_key.backup_user_key.id}' >> .env.live",
"echo 'AWS_BACKUP_SECRET_KEY=${aws_iam_access_key.backup_user_key.secret}' >> .env.live",
"echo 'AWS_BACKUP_BUCKET=${aws_s3_bucket.backup_bucket.id}' >> .env.live",
"echo 'AWS_BACKUP_REGION=${local.aws_region}' >> .env.live",

"docker compose -p app -f compose.yml --env-file ./.env.live up --build -d --quiet-pull"
]

Add new service into compose file:

deploy/compose.yml

database_glacierizer:
image: devforth/docker-database-glacierizer:v1.7

environment:
- PROJECT_NAME=MYAPP
# do backup every day at 00:00
- CRON=0 0 * * *

- DATABASE_TYPE=PostgreSQL
- DATABASE_HOST=db
- DATABASE_NAME=adminforth
- DATABASE_USER=admin
- DATABASE_PASSWORD=${VAULT_POSTGRES_PASSWORD}
- GLACIER_EXPIRE_AFTER=90
- GLACIER_STORAGE_CLASS=flexible
- GLACIER_BUCKET_NAME=${AWS_BACKUP_BUCKET}

- AWS_DEFAULT_REGION=${AWS_BACKUP_REGION}
- AWS_ACCESS_KEY_ID=${AWS_BACKUP_ACCESS_KEY}
- AWS_SECRET_ACCESS_KEY=${AWS_BACKUP_SECRET_KEY}

Pricing

Just to give you row idea about pricing, here is a small calculation for case when you doing backup once per day (like in config)

  • Compressed database backup has size of 50 MB always and not growing. (Compression is already done by glacierizer)
  • Cost of glacier every month will be ~$0.80 after first 3 month, and will stay same every next month.
  • On first, second and third month cost will increase slowly from $0.00 to $0.80 per month.

Deploy AdminForth to EC2 with terraform on CI

· 8 min read
Ivan Borshcho
Maintainer of AdminForth

Here is more advanced snippet to deploy AdminForth to Terraform.

Here Terraform state will be stored in the cloud, so you can run this deployment from any machine including stateless CI/CD.

We will use GitHub Actions as CI/CD, but you can use any other CI/CD, for example self-hosted free WoodpeckerCI.

Assume you have your AdminForth project in myadmin.

Step 1 - Dockerfile

Create file Dockerfile in myadmin:

./myadmin/Dockerfile
# use the same node version which you used during dev
FROM node:20-alpine
WORKDIR /code/
ADD package.json package-lock.json /code/
RUN npm ci
ADD . /code/
RUN --mount=type=cache,target=/tmp npx tsx bundleNow.ts
CMD ["npm", "run", "startLive"]

Step 2 - compose.yml

create folder deploy and create file compose.yml inside:

deploy/compose.yml

services:
traefik:
image: "traefik:v2.5"
command:
- "--api.insecure=true"
- "--providers.docker=true"
- "--entrypoints.web.address=:80"
ports:
- "80:80"
volumes:
- "/var/run/docker.sock:/var/run/docker.sock:ro"

myadmin:
build: ./myadmin
restart: always
env_file:
- ./myadmin/.env
volumes:
- myadmin-db:/code/db
labels:
- "traefik.enable=true"
- "traefik.http.routers.myadmin.rule=PathPrefix(`/`)"
- "traefik.http.services.myadmin.loadbalancer.server.port=3500"
- "traefik.http.routers.myadmin.priority=2"

volumes:
myadmin-db:

Step 3 - create a SSH keypair

Make sure you are in deploy folder, run next command here:

deploy
mkdir .keys && ssh-keygen -f .keys/id_rsa -N ""

Now it should create deploy/.keys/id_rsa and deploy/.keys/id_rsa.pub files with your SSH keypair. Terraform script will put the public key to the EC2 instance and will use private key to connect to the instance. Also you will be able to use it to connect to the instance manually.

Step 4 - .gitignore file

Create deploy/.gitignore file with next content:

.terraform/
.keys/
*.tfstate
*.tfstate.*
*.tfvars
tfplan

Step 5 - Main terraform file main.tf

First of all install Terraform as described here terraform installation.

Create file main.tf in deploy folder:

deploy/main.tf

locals {
app_name = "<your_app_name>"
aws_region = "eu-central-1"
}


provider "aws" {
region = local.aws_region
profile = "myaws"
}

data "aws_ami" "ubuntu_linux" {
most_recent = true
owners = ["amazon"]

filter {
name = "name"
values = ["ubuntu/images/hvm-ssd-gp3/ubuntu-noble-24.04-amd64-server-*"]
}
}

data "aws_vpc" "default" {
default = true
}


resource "aws_eip" "eip" {
domain = "vpc"
}
resource "aws_eip_association" "eip_assoc" {
instance_id = aws_instance.app_instance.id
allocation_id = aws_eip.eip.id
}

data "aws_subnet" "default_subnet" {
filter {
name = "vpc-id"
values = [data.aws_vpc.default.id]
}

filter {
name = "default-for-az"
values = ["true"]
}

filter {
name = "availability-zone"
values = ["${local.aws_region}a"]
}
}

resource "aws_security_group" "instance_sg" {
name = "${local.app_name}-instance-sg"
vpc_id = data.aws_vpc.default.id

ingress {
description = "Allow HTTP"
from_port = 80
to_port = 80
protocol = "tcp"
cidr_blocks = ["0.0.0.0/0"]
}

# SSH
ingress {
description = "Allow SSH"
from_port = 22
to_port = 22
protocol = "tcp"
cidr_blocks = ["0.0.0.0/0"]
}

egress {
description = "Allow all outbound traffic"
from_port = 0
to_port = 0
protocol = "-1"
cidr_blocks = ["0.0.0.0/0"]
}
}

resource "aws_key_pair" "app_deployer" {
key_name = "terraform-deploy_${local.app_name}-key"
public_key = file("./.keys/id_rsa.pub") # Path to your public SSH key
}

resource "aws_instance" "app_instance" {
ami = data.aws_ami.ubuntu_linux.id
instance_type = "t3a.small"
subnet_id = data.aws_subnet.default_subnet.id
vpc_security_group_ids = [aws_security_group.instance_sg.id]
key_name = aws_key_pair.app_deployer.key_name

# prevent accidental termination of ec2 instance and data loss
# if you will need to recreate the instance still (not sure why it can be?), you will need to remove this block manually by next command:
# > terraform taint aws_instance.app_instance
lifecycle {
prevent_destroy = true
ignore_changes = [ami]
}

root_block_device {
volume_size = 20 // Size in GB for root partition
volume_type = "gp2"

# Even if the instance is terminated, the volume will not be deleted, delete it manually if needed
delete_on_termination = false
}

user_data = <<-EOF
#!/bin/bash
sudo apt-get update
sudo apt-get install ca-certificates curl
sudo install -m 0755 -d /etc/apt/keyrings
sudo curl -fsSL https://download.docker.com/linux/ubuntu/gpg -o /etc/apt/keyrings/docker.asc
sudo chmod a+r /etc/apt/keyrings/docker.asc

# Add the repository to Apt sources:
echo \
"deb [arch=$(dpkg --print-architecture) signed-by=/etc/apt/keyrings/docker.asc] https://download.docker.com/linux/ubuntu \
$(. /etc/os-release && echo "$VERSION_CODENAME") stable" | \
sudo tee /etc/apt/sources.list.d/docker.list > /dev/null
sudo apt-get update

sudo apt-get install -y docker-ce docker-ce-cli containerd.io docker-buildx-plugin docker-compose-plugin

systemctl start docker
systemctl enable docker
usermod -a -G docker ubuntu
EOF

tags = {
Name = "${local.app_name}-instance"
}
}

resource "null_resource" "sync_files_and_run" {
# Use rsync to exclude node_modules, .git, db
provisioner "local-exec" {
# heredoc syntax
# remove files that where deleted on the source
command = <<-EOF
# -o StrictHostKeyChecking=no
rsync -t -av -e "ssh -i ./.keys/id_rsa -o StrictHostKeyChecking=no" \
--delete \
--exclude 'node_modules' \
--exclude '.git' \
--exclude '.terraform' \
--exclude 'terraform*' \
--exclude 'tfplan' \
--exclude '.keys' \
--exclude '.vscode' \
--exclude '.env' \
--exclude 'db' \
../ ubuntu@${aws_eip_association.eip_assoc.public_ip}:/home/ubuntu/app/
EOF
}

# Run docker compose after files have been copied
provisioner "remote-exec" {
inline = [
# fail bash specially and intentionally to stop the script on error
"bash -c 'while ! command -v docker &> /dev/null; do echo \"Waiting for Docker to be installed...\"; sleep 1; done'",
"bash -c 'while ! docker info &> /dev/null; do echo \"Waiting for Docker to start...\"; sleep 1; done'",

# please note that prune might destroy build cache and make build slower, however it releases disk space
"docker system prune -f",
# "docker buildx prune -f --filter 'type!=exec.cachemount'",
"cd /home/ubuntu/app/deploy",
# COMPOSE_FORCE_NO_TTY is needed to run docker compose in non-interactive mode and prevent stdout mess up
"COMPOSE_FORCE_NO_TTY=1 docker compose -p app -f compose.yml up --build -d"
]

connection {
type = "ssh"
user = "ubuntu"
private_key = file("./.keys/id_rsa")
host = aws_eip_association.eip_assoc.public_ip
}
}

# Ensure the resource is triggered every time based on timestamp or file hash
triggers = {
always_run = timestamp()
}

depends_on = [aws_instance.app_instance, aws_eip_association.eip_assoc]
}


output "instance_public_ip" {
value = aws_eip_association.eip_assoc.public_ip
}


######### This scetion is for tf state storage ##############

# S3 bucket for storing Terraform state
resource "aws_s3_bucket" "terraform_state" {
bucket = "${local.app_name}-terraform-state"
}

resource "aws_s3_bucket_lifecycle_configuration" "terraform_state" {
bucket = aws_s3_bucket.terraform_state.bucket

rule {
status = "Enabled"
id = "Keep only the latest version of the state file"

noncurrent_version_expiration {
noncurrent_days = 30
}
}
}

resource "aws_s3_bucket_versioning" "terraform_state" {
bucket = aws_s3_bucket.terraform_state.bucket

versioning_configuration {
status = "Enabled"
}
}

resource "aws_s3_bucket_server_side_encryption_configuration" "terraform_state" {
bucket = aws_s3_bucket.terraform_state.bucket

rule {
apply_server_side_encryption_by_default {
sse_algorithm = "AES256"
}
}
}


👆 Replace <your_app_name> with your app name (no spaces, only underscores or letters)

Step 5.1 - Configure AWS Profile

Open or create file ~/.aws/credentials and add (if not already there):

[myaws]
aws_access_key_id = <your_access_key>
aws_secret_access_key = <your_secret_key>

Step 5.2 - Run deployment

To run the deployment first time, you need to run:

terraform init

Now run deployement:

terraform apply -auto-approve

Step 6 - Migrate state to the cloud

First deployment had to create S3 bucket and DynamoDB table for storing Terraform state. Now we need to migrate the state to the cloud.

Add to the end of main.tf:

main.tf

# Configure the backend to use the S3 bucket and DynamoDB table
terraform {
backend "s3" {
bucket = "<your_app_name>-terraform-state"
key = "state.tfstate" # Define a specific path for the state file
region = "eu-central-1"
profile = "myaws"
dynamodb_table = "<your_app_name>-terraform-lock-table"
use_lockfile = true
}
}

👆 Replace <your_app_name> with your app name (no spaces, only underscores or letters). Unfortunately we can't use variables, HashiCorp thinks it is too dangerous 😥

Now run:

terraform init -migrate-state

Now run test deployment:

terraform apply -auto-approve

Now you can delete local terraform.tfstate file and terraform.tfstate.backup file as they are in the cloud now.

Step 7 - CI/CD - Github Actions

Create file .github/workflows/deploy.yml:

.github/workflows/deploy.yml
name: Deploy 
run-name: ${{ github.actor }} builds app 🚀
on: [push]
jobs:
Explore-GitHub-Actions:
runs-on: ubuntu-latest
steps:
- run: echo "🎉 The job was automatically triggered by a ${{ github.event_name }} event."
- run: echo "🐧 This job is now running on a ${{ runner.os }} server"
- run: echo "🔎 The name of your branch is ${{ github.ref }}"
- name: Check out repository code
uses: actions/checkout@v4
- name: Set up Terraform
uses: hashicorp/setup-terraform@v2
with:
terraform_version: 1.4.6
- run: echo "💡 The ${{ github.repository }} repository has been cloned to the runner."
- name: Start building
env:
VAULT_AWS_ACCESS_KEY_ID: ${{ secrets.VAULT_AWS_ACCESS_KEY_ID }}
VAULT_AWS_SECRET_ACCESS_KEY: ${{ secrets.VAULT_AWS_SECRET_ACCESS_KEY }}
VAULT_SSH_PRIVATE_KEY: ${{ secrets.VAULT_SSH_PRIVATE_KEY }}
VAULT_SSH_PUBLIC_KEY: ${{ secrets.VAULT_SSH_PUBLIC_KEY }}
run: |
/bin/sh -x deploy/deploy.sh

- run: echo "🍏 This job's status is ${{ job.status }}."

Step 7.1 - Create deploy script

Now create file deploy/deploy.sh:

deploy/deploy.sh

# cd to dir of script
cd "$(dirname "$0")"

mkdir -p ~/.aws ./.keys

cat <<EOF > ~/.aws/credentials
[myaws]
aws_access_key_id=$VAULT_AWS_ACCESS_KEY_ID
aws_secret_access_key=$VAULT_AWS_SECRET_ACCESS_KEY
EOF

cat <<EOF > ./.keys/id_rsa
$VAULT_SSH_PRIVATE_KEY
EOF

cat <<EOF > ./.keys/id_rsa.pub
$VAULT_SSH_PUBLIC_KEY
EOF

chmod 600 ./.keys/id_rsa*

# force Terraform to reinitialize the backend without migrating the state.
terraform init -reconfigure
terraform plan -out=tfplan
terraform apply tfplan

Step 7.2 - Add secrets to GitHub

Go to your GitHub repository, then Settings -> Secrets -> New repository secret and add:

  • VAULT_AWS_ACCESS_KEY_ID - your AWS access key
  • VAULT_AWS_SECRET_ACCESS_KEY - your AWS secret key
  • VAULT_SSH_PRIVATE_KEY - make cat ~/.ssh/id_rsa and paste to GitHub secrets
  • VAULT_SSH_PUBLIC_KEY - make cat ~/.ssh/id_rsa.pub and paste to GitHub secrets

Now you can push your changes to GitHub and see how it will be deployed automatically.

Deploy AdminForth to EC2 with terraform (without CI)

· 4 min read
Ivan Borshcho
Maintainer of AdminForth

Here is a row snippet to deploy AdminForth to Terraform.

Assume you have your AdminForth project in myadmin.

Create file Dockerfile in myadmin:

./myadmin/Dockerfile
# use the same node version which you used during dev
FROM node:20-alpine
WORKDIR /code/
ADD package.json package-lock.json /code/
RUN npm ci
ADD . /code/
RUN --mount=type=cache,target=/tmp npx tsx bundleNow.ts
CMD ["npm", "run", "startLive"]

Create file compose.yml:

compose.yml

services:
traefik:
image: "traefik:v2.5"
command:
- "--api.insecure=true"
- "--providers.docker=true"
- "--entrypoints.web.address=:80"
ports:
- "80:80"
volumes:
- "/var/run/docker.sock:/var/run/docker.sock:ro"

myadmin:
build: ./myadmin
restart: always
env_file:
- ./myadmin/.env
volumes:
- myadmin-db:/code/db
labels:
- "traefik.enable=true"
- "traefik.http.routers.myadmin.rule=PathPrefix(`/`)"
- "traefik.http.services.myadmin.loadbalancer.server.port=3500"
- "traefik.http.routers.myadmin.priority=2"

volumes:
myadmin-db:

Create file main.tf:

main.tf

provider "aws" {
region = "eu-central-1"
profile = "myaws"
}

data "aws_ami" "ubuntu_linux" {
most_recent = true
owners = ["amazon"]

filter {
name = "name"
values = ["ubuntu/images/hvm-ssd-gp3/ubuntu-noble-24.04-amd64-server-*"]
}
}

data "aws_vpc" "default" {
default = true
}

resource "aws_eip" "eip" {
vpc = true
}
resource "aws_eip_association" "eip_assoc" {
instance_id = aws_instance.myadmin_instance.id
allocation_id = aws_eip.eip.id
}

data "aws_subnet" "default_subnet" {
filter {
name = "vpc-id"
values = [data.aws_vpc.default.id]
}

filter {
name = "default-for-az"
values = ["true"]
}

filter {
name = "availability-zone"
values = ["eu-central-1a"]
}
}


resource "aws_security_group" "instance_sg" {
name = "myadmin-instance-sg"
vpc_id = data.aws_vpc.default.id

ingress {
description = "Allow HTTP"
from_port = 80
to_port = 80
protocol = "tcp"
cidr_blocks = ["0.0.0.0/0"]
}

# SSH
ingress {
description = "Allow SSH"
from_port = 22
to_port = 22
protocol = "tcp"
cidr_blocks = ["0.0.0.0/0"]
}

egress {
description = "Allow all outbound traffic"
from_port = 0
to_port = 0
protocol = "-1"
cidr_blocks = ["0.0.0.0/0"]
}
}

resource "aws_key_pair" "myadmin_deploy_key" {
key_name = "terraform-myadmin_deploy_key-key"
public_key = file("~/.ssh/id_rsa.pub") # Path to your public SSH key
}


resource "aws_instance" "myadmin_instance" {
ami = data.aws_ami.ubuntu_linux.id
instance_type = "t3a.small"
subnet_id = data.aws_subnet.default_subnet.id
vpc_security_group_ids = [aws_security_group.instance_sg.id]
key_name = aws_key_pair.myadmin_deploy_key.key_name

# prevent accidental termination of ec2 instance and data loss
# if you will need to recreate the instance still (not sure why it can be?), you will need to remove this block manually by next command:
# > terraform taint aws_instance.app_instance
lifecycle {
prevent_destroy = true
ignore_changes = [ami]
}


root_block_device {
volume_size = 20 // Size in GB for root partition
volume_type = "gp2"

# Even if the instance is terminated, the volume will not be deleted, delete it manually if needed
delete_on_termination = false
}

user_data = <<-EOF
#!/bin/bash
sudo apt-get update
sudo apt-get install ca-certificates curl
sudo install -m 0755 -d /etc/apt/keyrings
sudo curl -fsSL https://download.docker.com/linux/ubuntu/gpg -o /etc/apt/keyrings/docker.asc
sudo chmod a+r /etc/apt/keyrings/docker.asc

# Add the repository to Apt sources:
echo \
"deb [arch=$(dpkg --print-architecture) signed-by=/etc/apt/keyrings/docker.asc] https://download.docker.com/linux/ubuntu \
$(. /etc/os-release && echo "$VERSION_CODENAME") stable" | \
sudo tee /etc/apt/sources.list.d/docker.list > /dev/null
sudo apt-get update

sudo apt-get install -y docker-ce docker-ce-cli containerd.io docker-buildx-plugin docker-compose-plugin

systemctl start docker
systemctl enable docker
usermod -a -G docker ubuntu
EOF

tags = {
Name = "myadmin-instance"
}
}

resource "null_resource" "sync_files_and_run" {
# Use rsync to exclude node_modules, .git, db
provisioner "local-exec" {
# heredoc syntax
command = <<-EOF
rsync -t -av \
--delete \
--exclude 'node_modules' \
--exclude '.git' \
--exclude '.terraform' \
--exclude 'terraform*' \
--exclude '.vscode' \
--exclude 'db' \
./ ubuntu@${aws_eip_association.eip_assoc.public_ip}:/home/ubuntu/app/
EOF

}

# Run docker compose after files have been copied
provisioner "remote-exec" {
inline = [
"bash -c 'while ! command -v docker &> /dev/null; do echo \"Waiting for Docker to be installed...\"; sleep 1; done'",
"bash -c 'while ! docker info &> /dev/null; do echo \"Waiting for Docker to start...\"; sleep 1; done'",
# -a would destroy cache
"docker system prune -f",
"cd /home/ubuntu/app/",
# COMPOSE_FORCE_NO_TTY is needed to run docker compose in non-interactive mode and prevent stdout mess up
"COMPOSE_FORCE_NO_TTY=1 docker compose -f compose.yml up --build -d"
]

connection {
type = "ssh"
user = "ubuntu"
private_key = file("~/.ssh/id_rsa")
host = aws_eip_association.eip_assoc.public_ip
}
}

# Ensure the resource is triggered every time based on timestamp or file hash
triggers = {
always_run = timestamp()
}

depends_on = [aws_instance.myadmin_instance, aws_eip_association.eip_assoc]
}


output "instance_public_ip" {
value = aws_eip_association.eip_assoc.public_ip
}

To run the deployment first time, you need to run:

terraform init

Then with any change in code:

terraform apply -auto-approve

Build AI-Assisted blog with AdminForth and Nuxt in 20 minutes

· 19 min read
Ivan Borshcho
Maintainer of AdminForth

Many developers today are using copilots to write code faster and relax their minds from a routine tasks.

But what about writing plain text? For example blogs and micro-blogs: sometimes you want to share your progress but you are lazy for typing. Then you can give a try to AI-assisted blogging. Our Open-Source AdminForth framework has couple of new AI-capable plugins to write text and generate images.

alt text

For AI plugins are backed by OpenAI API, but their architecture allows to be easily extended for other AI providers once OpenAI competitors will reach the same or better level of quality.

Here we will suggest you simple as 1-2-3 steps to build and host a blog with AI assistant which will help you to write posts.

Our tech stack will include:

  • Nuxt.js - SEO-friendly page rendering framework
  • AdminForth - Admin panel framework for creating posts
  • AdminForth RichEditor plugin - WYSIWYG editor with AI assistant in Copilot style
  • Node and typescript
  • Prisma for migrations
  • SQLite for database, though you can easily switch it to Postgres or MongoDB

Prerequirements

We will use Node v20, if you not have it installed, we recommend NVM

nvm install 20
nvm alias default 20
nvm use 20

Step 1: Create a new AdminForth project

mkdir ai-blog
cd ai-blog
npm init -y
npm install adminforth @adminforth/upload @adminforth/rich-editor @adminforth/chat-gpt \
express slugify http-proxy @types/express typescript tsx @types/node --save-dev
npx --yes tsc --init --module NodeNext --target ESNext

Step 2: Prepare environment

OpenAI

To allocate OpenAI API key, go to https://platform.openai.com/, open Dashboard -> API keys -> Create new secret key.

S3

  1. Go to https://aws.amazon.com and login.
  2. Go to Services -> S3 and create a bucket. Put in bucket name e.g. my-ai-blog-bucket. First of all go to your bucket settings, Permissions, scroll down to Block public access (bucket settings for this bucket) and uncheck all checkboxes. Go to bucket settings, Permissions, Object ownership and select "ACLs Enabled" and "Bucket owner preferred" radio buttons.
  3. Go to bucket settings, Permissions, scroll down to Cross-origin resource sharing (CORS) and put in the following configuration:
[
{
"AllowedHeaders": [
"*"
],
"AllowedMethods": [
"PUT"
],
"AllowedOrigins": [
"http://localhost:3500"
],
"ExposeHeaders": []
}
]

☝️ In AllowedOrigins add all your domains. For example if you will serve blog and admin on https://blog.example.com/ you should add "https://blog.example.com" to AllowedOrigins:

[
"https://blog.example.com",
"http://localhost:3500"
]

Every character matters, so don't forget to add http:// or https:// and don't add slashes at the end of the domain.

  1. Go to Services -> IAM and create a new user. Put in user name e.g. my-ai-blog-bucket.
  2. Attach existing policies directly -> AmazonS3FullAccess. Go to your user -> Add permissions -> Attach policies directly -> AmazonS3FullAccess
  3. Go to Security credentials and create a new access key. Save Access key ID and Secret access key.

Create .env file in project directory

Create .env file with the following content:

.env
DATABASE_URL=file:./db/db.sqlite
ADMINFORTH_SECRET=<some random string>
OPENAI_API_KEY=...
AWS_ACCESS_KEY_ID=your_access_key_id
AWS_SECRET_ACCESS_KEY=your_secret_access_key
AWS_S3_BUCKET=my-ai-blog-bucket
AWS_S3_REGION=us-east-1

Step 3: Initialize database

Create ./schema.prisma and put next content there:

./schema.prisma
generator client {
provider = "prisma-client-js"
}

datasource db {
provider = "sqlite"
url = env("DATABASE_URL")
}

model User {
id String @id
createdAt DateTime
email String @unique
avatar String?
publicName String?
passwordHash String
posts Post[]
}

model Post {
id String @id
createdAt DateTime
title String
slug String
picture String?
content String
published Boolean
author User? @relation(fields: [authorId], references: [id])
authorId String?
contentImages ContentImage[]
}

model ContentImage {
id String @id
createdAt DateTime
img String
postId String
resourceId String
post Post @relation(fields: [postId], references: [id])
}

Create database using prisma migrate:

npx -y prisma migrate dev --name init

in future if you will need to update schema, you can run npx prisma migrate dev --name <name> where <name> is a name of migration.

Step 4: Setting up AdminForth

Open package.json, set type to module and add start script:

./package.json
{
...
"type": "module",
"scripts": {
...
"start": "NODE_ENV=development tsx watch --env-file=.env index.ts",
"startLive": "NODE_ENV=production APP_PORT=80 tsx index.ts"
},
}

Create index.ts file in root directory with following content:

./index.ts
import express from 'express';
import AdminForth, { Filters, Sorts } from 'adminforth';
import userResource from './res/user.js';
import postResource from './res/posts.js';
import contentImageResource from './res/content-image.js';
import httpProxy from 'http-proxy';

declare var process : {
env: {
DATABASE_URL: string
NODE_ENV: string,
AWS_S3_BUCKET: string,
AWS_S3_REGION: string,
}
argv: string[]
}

export const admin = new AdminForth({
baseUrl: '/admin',
auth: {
usersResourceId: 'user', // resource to get user during login
usernameField: 'email', // field where username is stored, should exist in resource
passwordHashField: 'passwordHash',
},
customization: {
brandName: 'My Admin',
datesFormat: 'D MMM',
timeFormat: 'HH:mm',
emptyFieldPlaceholder: '-',
styles: {
colors: {
light: {
// color for links, icons etc.
primary: 'rgb(47 37 227)',
// color for sidebar and text
sidebar: {main:'#EFF5F7', text:'#333'},
},
}
}
},
dataSources: [{
id: 'maindb',
url: process.env.DATABASE_URL?.replace('file:', 'sqlite://'),
}],
resources: [
userResource,
postResource,
contentImageResource,
],
menu: [
{
homepage: true,
label: 'Posts',
icon: 'flowbite:home-solid',
resourceId: 'post',
},
{ type: 'gap' },
{ type: 'divider' },
{ type: 'heading', label: 'SYSTEM' },
{
label: 'Users',
icon: 'flowbite:user-solid',
resourceId: 'user',
}
],
});


if (import.meta.url === `file://${process.argv[1]}`) {
// if script is executed directly e.g. node index.ts or npm start

const app = express()
app.use(express.json());
const port = 3500;

// needed to compile SPA. Call it here or from a build script e.g. in Docker build time to reduce downtime
if (process.env.NODE_ENV === 'development') {
await admin.bundleNow({ hotReload: true });
}
console.log('Bundling AdminForth done. For faster serving consider calling bundleNow() from a build script.');

// api to server recent posts
app.get('/api/posts', async (req, res) => {
const { offset = 0, limit = 100, slug = null } = req.query;
const posts = await admin.resource('post').list(
[Filters.EQ('published', true), ...(slug ? [Filters.LIKE('slug', slug)] : [])],
limit,
offset,
Sorts.DESC('createdAt'),
);
const authorIds = [...new Set(posts.map((p: any) => p.authorId))];
const authors = (await admin.resource('user').list(Filters.IN('id', authorIds)))
.reduce((acc: any, a: any) => {acc[a.id] = a; return acc;}, {});
posts.forEach((p: any) => {
const author = authors[p.authorId];
p.author = {
publicName: author.publicName,
avatar: `https://${process.env.AWS_S3_BUCKET}.s3.${process.env.AWS_S3_REGION}.amazonaws.com/${author.avatar}`
};
p.picture = `https://${process.env.AWS_S3_BUCKET}.s3.${process.env.AWS_S3_REGION}.amazonaws.com/${p.picture}`;
});
res.json(posts);
});

// here we proxy all non-/admin requests to nuxt instance http://localhost:3000
// this is done for demo purposes, in production you should do this using high-performance reverse proxy like traefik or nginx
app.use((req, res, next) => {
if (!req.url.startsWith('/admin')) {
const proxy = httpProxy.createProxyServer();
proxy.on('error', function (err, req, res) {
res.send(`No response from Nuxt at http://localhost:3000, did you start it? ${err}`)
});
proxy.web(req, res, { target: 'http://localhost:3000' });
} else {
next();
}
});

// serve after you added all api
admin.express.serve(app)

admin.discoverDatabases().then(async () => {
if (!await admin.resource('user').get([Filters.EQ('email', 'adminforth@adminforth.dev')])) {
await admin.resource('user').create({
email: 'adminforth@adminforth.dev',
passwordHash: await AdminForth.Utils.generatePasswordHash('adminforth'),
});
}
});

admin.express.listen(port, () => {
console.log(`\n⚡ AdminForth is available at http://localhost:${port}\n`)
});
}

Step 5: Create resources

Create res folder. Create ./res/user.ts file with following content:

./res/users.ts
import AdminForth, { AdminForthDataTypes } from 'adminforth';
import { randomUUID } from 'crypto';
import UploadPlugin from '@adminforth/upload';

export default {
dataSource: 'maindb',
table: 'user',
label: 'Users',
recordLabel: (r: any) => `👤 ${r.email}`,
columns: [
{
name: 'id',
primaryKey: true,
fillOnCreate: () => randomUUID(),
showIn: ['list', 'filter', 'show'],
},
{
name: 'email',
required: true,
isUnique: true,
enforceLowerCase: true,
validation: [
AdminForth.Utils.EMAIL_VALIDATOR,
],
type: AdminForthDataTypes.STRING,
},
{
name: 'createdAt',
type: AdminForthDataTypes.DATETIME,
showIn: ['list', 'filter', 'show'],
fillOnCreate: () => (new Date()).toISOString(),
},
{
name: 'password',
virtual: true,
required: { create: true },
editingNote: { edit: 'Leave empty to keep password unchanged' },
minLength: 8,
type: AdminForthDataTypes.STRING,
showIn: ['create', 'edit'],
masked: true,
validation: [
// request to have at least 1 digit, 1 upper case, 1 lower case
AdminForth.Utils.PASSWORD_VALIDATORS.UP_LOW_NUM,
],
},
{ name: 'passwordHash', backendOnly: true, showIn: [] },
{
name: 'publicName',
type: AdminForthDataTypes.STRING,
},
{ name: 'avatar' },
],
hooks: {
create: {
beforeSave: async ({ record, adminUser, resource }) => {
record.passwordHash = await AdminForth.Utils.generatePasswordHash(record.password);
return { ok: true };
}
},
edit: {
beforeSave: async ({ record, adminUser, resource }) => {
if (record.password) {
record.passwordHash = await AdminForth.Utils.generatePasswordHash(record.password);
}
return { ok: true }
},
},
}
plugins: [
new UploadPlugin({
pathColumnName: 'avatar',
s3Bucket: process.env.AWS_S3_BUCKET,
s3Region: process.env.AWS_S3_REGION,
allowedFileExtensions: ['jpg', 'jpeg', 'png', 'gif', 'webm','webp'],
maxFileSize: 1024 * 1024 * 20, // 20MB
s3AccessKeyId: process.env.AWS_ACCESS_KEY_ID,
s3SecretAccessKey: process.env.AWS_SECRET_ACCESS_KEY,
s3ACL: 'public-read', // ACL which will be set to uploaded file
s3Path: (
{ originalFilename, originalExtension }: {originalFilename: string, originalExtension: string }
) => `user-avatars/${new Date().getFullYear()}/${randomUUID()}/${originalFilename}.${originalExtension}`,
generation: {
provider: 'openai-dall-e',
countToGenerate: 2,
openAiOptions: {
model: 'dall-e-3',
size: '1024x1024',
apiKey: process.env.OPENAI_API_KEY,
},
},
}),
],
}

Create posts.ts file in res directory with following content:

./res/post.ts
import { AdminUser, AdminForthDataTypes } from 'adminforth';
import { randomUUID } from 'crypto';
import UploadPlugin from '@adminforth/upload';
import RichEditorPlugin from '@adminforth/rich-editor';
import ChatGptPlugin from '@adminforth/chat-gpt';
import slugify from 'slugify';

export default {
table: 'post',
dataSource: 'maindb',
label: 'Posts',
recordLabel: (r: any) => `📝 ${r.title}`,
columns: [
{
name: 'id',
primaryKey: true,
fillOnCreate: () => randomUUID(),
showIn: ['filter', 'show'],
},
{
name: 'title',
required: true,
showIn: ['list', 'create', 'edit', 'filter', 'show'],
maxLength: 255,
minLength: 3,
type: AdminForthDataTypes.STRING,
},
{
name: 'picture',
showIn: ['list', 'create', 'edit', 'filter', 'show'],
},
{
name: 'slug',
showIn: ['filter', 'show'],
},
{
name: 'content',
showIn: ['create', 'edit', 'filter', 'show'],
type: AdminForthDataTypes.RICHTEXT,
},
{
name: 'createdAt',
showIn: ['list', 'filter', 'show',],
fillOnCreate: () => (new Date()).toISOString(),
},
{
name: 'published',
required: true,
},
{
name: 'authorId',
foreignResource: {
resourceId: 'user',
},
showIn: ['filter', 'show'],
fillOnCreate: ({ adminUser }: { adminUser: AdminUser }) => {
return adminUser.dbUser.id;
}
}
],
hooks: {
create: {
beforeSave: async ({ record, adminUser }: { record: any, adminUser: AdminUser }) => {
record.slug = slugify(record.title, { lower: true });
return { ok: true };
},
},
edit: {
beforeSave: async ({ record, adminUser }: { record: any, adminUser: AdminUser }) => {
if (record.title) {
record.slug = slugify(record.title, { lower: true });
}
return { ok: true };
},
},
},
plugins: [
new UploadPlugin({
pathColumnName: 'picture',
s3Bucket: process.env.AWS_S3_BUCKET,
s3Region: process.env.AWS_S3_REGION,
allowedFileExtensions: ['jpg', 'jpeg', 'png', 'gif', 'webm','webp'],
maxFileSize: 1024 * 1024 * 20, // 20MB
s3AccessKeyId: process.env.AWS_ACCESS_KEY_ID,
s3SecretAccessKey: process.env.AWS_SECRET_ACCESS_KEY,
s3ACL: 'public-read', // ACL which will be set to uploaded file
s3Path: (
{ originalFilename, originalExtension }: {originalFilename: string, originalExtension: string }
) => `post-previews/${new Date().getFullYear()}/${randomUUID()}/${originalFilename}.${originalExtension}`,
generation: {
provider: 'openai-dall-e',
countToGenerate: 2,
openAiOptions: {
model: 'dall-e-3',
size: '1792x1024',
apiKey: process.env.OPENAI_API_KEY,
},
fieldsForContext: ['title'],
},
}),
new RichEditorPlugin({
htmlFieldName: 'content',
completion: {
provider: 'openai-chat-gpt',
params: {
apiKey: process.env.OPENAI_API_KEY,
model: 'gpt-4o',
},
expert: {
debounceTime: 250,
}
},
attachments: {
attachmentResource: 'contentImage',
attachmentFieldName: 'img',
attachmentRecordIdFieldName: 'postId',
attachmentResourceIdFieldName: 'resourceId',
},
}),
new ChatGptPlugin({
openAiApiKey: process.env.OPENAI_API_KEY,
model: 'gpt-4o',
fieldName: 'title',
expert: {
debounceTime: 250,
}
}),
]
}

Also create content-image.ts file in res directory with following content:

./res/content-image.ts

import { AdminForthDataTypes } from 'adminforth';
import { randomUUID } from 'crypto';
import UploadPlugin from '@adminforth/upload';

export default {
table: 'contentImage',
dataSource: 'maindb',
label: 'Content Images',
recordLabel: (r: any) => `🖼️ ${r.img}`,
columns: [
{
name: 'id',
primaryKey: true,
fillOnCreate: () => randomUUID(),
},
{
name: 'createdAt',
type: AdminForthDataTypes.DATETIME,
fillOnCreate: () => (new Date()).toISOString(),
},
{
name: 'img',
type: AdminForthDataTypes.STRING,
required: true,
},
{
name: 'postId',
foreignResource: {
resourceId: 'post',
},
showIn: ['list', 'filter', 'show'],
},
{
name: 'resourceId',
}
],
plugins: [
new UploadPlugin({
pathColumnName: 'img',
s3Bucket: process.env.AWS_S3_BUCKET,
s3Region: process.env.AWS_S3_REGION,
allowedFileExtensions: ['jpg', 'jpeg', 'png', 'gif', 'webm','webp'],
maxFileSize: 1024 * 1024 * 20, // 20MB
s3AccessKeyId: process.env.AWS_ACCESS_KEY_ID,
s3SecretAccessKey: process.env.AWS_SECRET_ACCESS_KEY,
s3ACL: 'public-read', // ACL which will be set to uploaded file
s3Path: (
{ originalFilename, originalExtension }: {originalFilename: string, originalExtension: string }
) => `post-content/${new Date().getFullYear()}/${randomUUID()}/${originalFilename}.${originalExtension}`,
}),
],
}

Now you can start your admin panel:

npm start

Open http://localhost:3500/admin in your browser and login with adminforth@adminforth.dev and adminforth credentials. Set up your avatar (you can generate it with AI) and public name in user settings.

alt text

Step 5: Create Nuxt project

Now let's initialize our seo-facing frontend:

npx nuxi@latest init seo
cd seo
npm install -D sass-embedded
npm run dev

Edit app.vue:

./seo/app.vue
<template>
<div id="app">
<NuxtPage />
</div>
</template>


<style lang="scss">

$grColor1: #74E1FF;
$grColor2: #8580B4;
$grColor3: #5E53C3;
$grColor4: #4FC7E9;
$grColor5: #695BE9;

#app {
font-family: Avenir, Helvetica, Arial, sans-serif;
-webkit-font-smoothing: antialiased;
-moz-osx-font-smoothing: grayscale;
// gradient with color spots
animation: gradient 15s ease infinite;
min-height: 100vh;
}
body {
margin: 0;
padding: 0;
max-height: 100vh;
overflow: overlay;
background-image: radial-gradient(
circle farthest-corner at top left, $grColor1 0%, rgba(225, 243, 97,0) 50%),
radial-gradient(
circle farthest-side at top right, $grColor2 0%, rgba(181, 176, 177,0) 10%),
radial-gradient(circle farthest-corner at bottom right, $grColor3 0%, rgba(204, 104, 119, 0) 33%),
radial-gradient(
circle farthest-corner at top right, $grColor4 0%, rgba(155, 221, 240,0) 50%),
radial-gradient(ellipse at bottom center, $grColor5 0%, rgba(254, 43, 0, 0) 80%);
background-attachment: fixed;
}
</style>

Add folder pages and create index.vue:

./seo/pages/index.vue
<template>
<div class="container">
<PostCard
v-for="post in posts"
:key="post.id"
:post="post"
/>
<div class="no-posts" v-if="!posts.length">
No posts added yet
<a href="/admin">Add a first one in admin</a>
</div>
</div>
</template>

<style lang="scss">
.container {
display: flex;
justify-content: center;
align-items: center;
flex-wrap: wrap;
flex-direction: column;
gap: 1rem;
padding-top: 2rem;
}

.no-posts {
margin-top: 2rem;
font-size: 1.5rem;
text-align: center;
background-color: rgba(255 244 255 / 0.43);
padding: 2rem;
border-radius: 0.5rem;
border: 1px solid #FFFFFF;
box-shadow: 0.2rem 0.3rem 2rem rgba(0, 0, 0, 0.1);
color: #555;
a {
color: #333;
text-decoration: underline;
margin-top: 1rem;
display: block;
font-size: 1.2rem;
}

}
</style>

<script lang="ts" setup>

import PostCard from '~/PostCard.vue'

const posts = ref([])

onMounted(async () => {
const resp = await fetch(`/api/posts`);
posts.value = await resp.json();
})

</script>

Finally, create PostCard.vue component:

./seo/PostCard.vue
<template>
<div class="post-card">
<img v-if="props.post.picture" :src="props.post.picture" alt="post image" />
<h2>{{ props.post.title }}</h2>
<div class="content" v-html="props.post.content"></div>
<div class="posted-at">
<div>{{ formatDate(props.post.createdAt) }}</div>
<div class="author">
<img :src="props.post.author.avatar" alt="author avatar" />
<div>
{{ props.post.author.publicName }}
</div>
</div>
</div>
</div>
</template>

<script setup lang="ts">

const props = defineProps<{
post: {
title: string
content: string
createdAt: string // iso date
picture?: string
author: {
publicName: string
avatar: string
}
}
}>()


function formatDate(date: string) {
// format to format MMM DD, YYYY using Intl.DateTimeFormat
return new Intl.DateTimeFormat('en-US', {
month: 'short',
day: '2-digit',
year: 'numeric'
}).format(new Date(date))
}
</script>

<style lang="scss">

.post-card {
background-color: rgba(255 244 255 / 0.43);
padding: 2rem;
border-radius: 0.5rem;
border: 1px solid #FFFFFF;
box-shadow: 0.2rem 0.3rem 2rem rgba(0, 0, 0, 0.1);
max-width: calc(100vw - 4rem);
width: 600px;
color: #333;
line-height: 1.8rem;

>img {
width: 100%;
border-radius: 0.5rem;
margin-bottom: 2rem;
}

h2 {
margin: 0 0 2rem 0;
font-size: 1.5rem;
}

.content {
margin-top: 1rem;
}

.posted-at {
margin-top: 1rem;
font-size: 0.8rem;
color: #666;
display: flex;
justify-content: space-between;
align-items: center;
}

.author {
display: flex;
align-items: center;

img {
width: 2rem;
height: 2rem;
border-radius: 50%;
margin-right: 0.5rem;
}
div {
// flash wire dot line effect
position: relative;
overflow: hidden;
border-radius: 1rem;
padding: 0.2rem 0.5rem;
font-size: 1rem;
background: linear-gradient(90deg, rgb(0 21 255) 0%, rgb(0 0 0) 100%);
background-size: 200% auto;
background-clip: text;
-webkit-background-clip: text;
color: transparent; /* Hide the original text color */
animation: shimmer 2s infinite;
@keyframes shimmer {
0% {
background-position: -200% center;
}
100% {
background-position: 200% center;
}
}

}
}

}

</style>

Now you can start your Nuxt project:

npm run dev

And run npm start if you did not run it previously:

npm start

Open http://localhost:3500 in your browser and you will see your blog with posts from admin panel:

alt text

Go to http://localhost:3500/admin to add new posts.

Step 6: Deploy

We will dockerize app to make it easy to deploy with many ways. We will wrap both Node.js adminforth app and Nuxt.js app into single container for simplicity using supervisor. However you can split them into two containers and deploy them separately e.g. using docker compose.

Please note that in this demo example we routing requests to Nuxt.js app from AdminForth app using http-proxy. While this will work fine, it might give slower serving then if you would route traffik using dedicated reverse proxies like traefik or nginx.

Dockerize in single container

Create bundleNow.ts file in root project directory:

./bundleNow.ts
import { admin } from './index.js';

await admin.bundleNow({ hotReload: false});
console.log('Bundling AdminForth done.');

Create Dockerfile in root project directory:

./Dockerfile
FROM node:20-alpine
EXPOSE 3500
WORKDIR /app
RUN apk add --no-cache supervisor
COPY package.json package-lock.json ./
RUN npm ci
COPY seo/package.json seo/package-lock.json seo/
RUN cd seo && npm ci
COPY . .

RUN npx tsx bundleNow.ts
RUN cd seo && npm run build

RUN cat > /etc/supervisord.conf <<EOF
[supervisord]
nodaemon=true

[program:app]
command=npm run startLive
directory=/app
autostart=true
autorestart=true
stdout_logfile=/dev/stdout
stderr_logfile=/dev/stderr

[program:seo]
command=sh -c "cd seo && node .output/server/index.mjs"
directory=/app
autostart=true
autorestart=true
stdout_logfile=/dev/stdout
stderr_logfile=/dev/stderr

[program:prisma]
command=npx --yes prisma migrate deploy
directory=/app
autostart=true
stdout_logfile=/dev/stdout
stderr_logfile=/dev/stderr

EOF

CMD ["supervisord", "-c", "/etc/supervisord.conf"]

Create .dockerignore file in root project directory:

.dockerignore
.env
node_modules
seo/node_modules
.git
db
*.tar
.terraform*
terraform*
*.tf

Build and run your docker container locally:

sudo docker run -p80:3500 -v ./prodDb:/app/db --env-file .env -it $(docker build -q .)

Now you can open http://localhost in your browser and see your blog.

Deploy to EC2 with terraform

First of all install Terraform as described here terraform installation.

If you are on Ubuntu(WSL2 or native) you can use the following commands:

wget -O- https://apt.releases.hashicorp.com/gpg | sudo gpg --dearmor -o /usr/share/keyrings/hashicorp-archive-keyring.gpg
echo "deb [signed-by=/usr/share/keyrings/hashicorp-archive-keyring.gpg] https://apt.releases.hashicorp.com $(lsb_release -cs) main" | sudo tee /etc/apt/sources.list.d/hashicorp.list
sudo apt update && sudo apt install terraform

Create special AWS credentials for deployemnts by going to AWS console -> IAM -> Users -> Add user (e.g. my-ai-blog-user) -> Attach existing policies directly -> AdministratorAccess -> Create user. Save Access key ID and Secret access key into ~/.aws/credentials file:

Create or open file:

code ~/.aws/credentials
...

[myaws]
aws_access_key_id = YOUR_ACCESS_KEY
aws_secret_access_key = YOUR_SECRET

Create file main.tf in root project directory:

./main.tf
provider "aws" {
region = "eu-central-1"
profile = "myaws"
}

data "aws_ami" "amazon_linux" {
most_recent = true
owners = ["amazon"]

filter {
name = "name"
values = ["amzn2-ami-hvm-*-x86_64-gp2"]
}
}

data "aws_vpc" "default" {
default = true
}

data "aws_subnet" "default_subnet" {
filter {
name = "vpc-id"
values = [data.aws_vpc.default.id]
}

filter {
name = "default-for-az"
values = ["true"]
}

filter {
name = "availability-zone"
values = ["eu-central-1a"]
}
}

resource "aws_security_group" "instance_sg" {
name = "my-ai-blog-instance-sg"
vpc_id = data.aws_vpc.default.id

ingress {
description = "Allow HTTP"
from_port = 80
to_port = 80
protocol = "tcp"
cidr_blocks = ["0.0.0.0/0"]
}

# SSH
ingress {
description = "Allow SSH"
from_port = 22
to_port = 22
protocol = "tcp"
cidr_blocks = ["0.0.0.0/0"]
}

egress {
description = "Allow all outbound traffic"
from_port = 0
to_port = 0
protocol = "-1"
cidr_blocks = ["0.0.0.0/0"]
}
}

resource "aws_key_pair" "deployer" {
key_name = "terraform-deployer-key"
public_key = file("~/.ssh/id_rsa.pub") # Path to your public SSH key
}


resource "aws_instance" "docker_instance" {
ami = data.aws_ami.amazon_linux.id
instance_type = "t3a.micro"
subnet_id = data.aws_subnet.default_subnet.id
vpc_security_group_ids = [aws_security_group.instance_sg.id]
key_name = aws_key_pair.deployer.key_name

# prevent accidental termination of ec2 instance and data loss
# if you will need to recreate the instance still (not sure why it can be?), you will need to remove this block manually by next command:
# > terraform taint aws_instance.app_instance
lifecycle {
prevent_destroy = true
ignore_changes = [ami]
}

user_data = <<-EOF
#!/bin/bash
yum update -y
amazon-linux-extras install docker -y
systemctl start docker
systemctl enable docker
usermod -a -G docker ec2-user
EOF

tags = {
Name = "my-ai-blog-instance"
}
}

resource "null_resource" "build_image" {
provisioner "local-exec" {
command = "docker build -t blogapp . && docker save blogapp:latest -o blogapp_image.tar"
}
triggers = {
always_run = timestamp() # Force re-run if necessary
}
}

resource "null_resource" "remote_commands" {
depends_on = [aws_instance.docker_instance, null_resource.build_image]

triggers = {
always_run = timestamp()
}


provisioner "file" {
source = "${path.module}/blogapp_image.tar"
destination = "/home/ec2-user/blogapp_image.tar"

connection {
type = "ssh"
user = "ec2-user"
private_key = file("~/.ssh/id_rsa")
host = aws_instance.docker_instance.public_ip
}
}

provisioner "file" {
source = "${path.module}/.env"
destination = "/home/ec2-user/.env"

connection {
type = "ssh"
user = "ec2-user"
private_key = file("~/.ssh/id_rsa")
host = aws_instance.docker_instance.public_ip
}
}

provisioner "remote-exec" {
inline = [
"while ! command -v docker &> /dev/null; do echo 'Waiting for Docker to be installed...'; sleep 1; done",
"while ! sudo docker info &> /dev/null; do echo 'Waiting for Docker to start...'; sleep 1; done",
"sudo docker system prune -af",
"docker load -i /home/ec2-user/blogapp_image.tar",
"sudo docker rm -f blogapp || true",
"sudo docker run --env-file .env -d -p 80:3500 --name blogapp -v /home/ec2-user/db:/app/db blogapp"
]

connection {
type = "ssh"
user = "ec2-user"
private_key = file("~/.ssh/id_rsa")
host = aws_instance.docker_instance.public_ip
}
}


}

output "instance_public_ip" {
value = aws_instance.docker_instance.public_ip
}

Now you can deploy your app to AWS EC2:

terraform init
terraform apply -auto-approve

☝️ To destroy and stop billing run terraform destroy -auto-approve

☝️ To check logs run ssh -i ~/.ssh/id_rsa ec2-user@$(terraform output instance_public_ip), then sudo docker logs -n100 -f aiblog

Terraform config will build Docker image locally and then copy it to EC2 instance. This approach allows to save build resources (CPU/RAM) on EC2 instance, however increases network traffic (image might be around 200MB). If you want to build image on EC2 instance, you can adjust config slightly: remove null_resource.build_image and change null_resource.remote_commands to build image on EC2 instance, however micro instance most likely will not be able to build and keep app running at the same time, so you will need to increase instance type or terminate app while building image (which introduces downtime so not recommended as well).

Add HTTPs and CDN

For adding HTTPS and CDN you will use free Cloudflare service (though you can use paid AWS Cloudfront or any different way e.g. add Traefik and Let's Encrypt). Go to https://cloudflare.com and create an account. Add your domain and follow instructions to change your domain nameservers to Cloudflare ones.

Go to your domain settings and add A record with your server IP address, which was shown in output of terraform apply command.

Type: A
Name: blog
Value: x.y.z.w
Cloudflare proxy: orange (enabled)

alt text

Chat-GPT plugin to co-write texts and strings

· 4 min read
Ivan Borshcho
Maintainer of AdminForth

Couple of days ago we released a plugin which allows you to co-write texts and strings with the AI.

Today LLM is already a must tool to speed-up writing, brainstorming, or generating ideas.

Here is how it looks in action:

alt text

Simple controls

To control plugin we use our open-source vue-suggestion-input. It allows to:

  • Complete suggestion with Tab.
  • Complete word with Ctrl + Right.
  • Regenerate suggestion with Ctrl + Down.
  • On mobile suggestion word is accepted with swipe right on the screen.

Want to try it out?

Go to a Live Demo and start creating a new apartment record. Type in the title and description field and see how the plugin works.

If you want to try it out on your hello-wrold admin panel, then, first follow the instructions in the Getting Started tutorial to create a new project. To install the plugin, then, follow the instructions in the Chat-GPT plugin page.

Context matters, but with sane limit!

When the prompts are called, the plugin passes to LLM not only previous text in current field to complete, but also passes values of other fields in record edited. This allows to generate more relevant completions. For example if you have a record with fields title and description, and you are editing description, the plugin will pass title value to LLM as well.

But obviously longer prompts lead to higher LLM costs and longer response times. That is why we created mechanics to limit the length of prompts passed to LLM.

Limitation is done on 2 levels:

  • plugin settings have expert.promptInputLimit - limits length of edited field passed to LLM. If field is longer, it will pass only last promptInputLimit characters.
  • plugin settings have expert.recordContext which defines limits for other fields in record. Each field can't be longer then maxFieldLength (default is 300). If field is longer then it is split to parts splitParts and they are joined with '...'. Also if there are more non-empty fields then maxFields, then plugin selects top longest maxFields fields to pass to LLM.

In the end, total number of characters passed to LLM is limited by formula:

promptInputLimit + maxFields * maxFieldLength + <LLM request static part>

Where <LLM request static part> is a constant part of request to LLM which looks like this:

Continue writing for text/string field "${this.options.fieldName}" in the table "${resLabel}"\n
Record has values for the context: ${inputContext}\n
Current field value: ${currentVal}\n
Don't talk to me. Just write text. No quotes. Don't repeat current field value, just write completion\n

Model configuration

Of course you can define which model to use for completion. By default plugin uses gpt-4o-mini model ($0.150 / 1M input tokens, $0.600 / 1M output tokens for Aug 2024). But you can change it to any other model available in OpenAI API. More powerful replacement is gpt-4o model ($5.00 / 1M input tokens, $15.00 / 1M output tokens for Aug 2024).

Also you can define other parameters for completion like:

  • maxTokens - most likely you don't want to waste tokens on longer completions, so default is 50 tokens.
  • temperature - model temperature, default is 0.7. You can increase it to get more creative completions (but with risk of getting nonsense). Or decrease it to get more conservative completions.
  • debounceTime - debounce time in milliseconds, default is 300. After typing each character, plugin waits for debounceTime milliseconds before sending request to LLM. If new character is typed during this time, then timer is reset. This is done to prevent sending too many requests to LLM.

Frontend story

When we were working on plugin, we wanted to make it as user-friendly as possible.

Most frontend packages for completion have old-fashioned dropdowns, which are not very convenient to use.

We wanted to have something very similar to Copilot or Google doc. So we created our own package vue-suggestion-input. It is also MIT and open-source so you can use it in your projects as well.

Under the hood vue-suggestion-input uses quill editor. Quill is one of the WYSIWYG editors which have really good API to work with DOM inside of editor. Basically all pieces of content in editor are represented as so called blots. And best thing - you can create your own custom blot. So we created our own blot which is responsible for rendering completion suggestion. Then you just "dance" around positioning of selection, suggestion and text modification, and thees things are easy-peasy with quill API.