Two-Factor Authentication Plugin
The Two-Factor Authentication Plugin provides an additional layer of security to the application by requiring users to provide a second form of authentication in addition to their password. This plugin supports authenticator apps.
Plugin supports next 2FA methods:
- TOTP (Time-based One-Time Password) via authenticator apps (Google Authenticator, Authy, Microsoft Authenticator, etc)
- Upgrade to Passkeys (WebAuthn) alongside TOTP (with TOTP as alternative method)
Also it supports both:
- Multi-Factor Authentication (MFA): asking for 2FA on every login (or single WebAuthn passkey login)
- Step-Up MFA: asking for 2FA again on critical operations (custom actions, secure save etc)
Installation
pnpm i @adminforth/two-factors-auth --save
To import:
import TwoFactorsAuthPlugin from '@adminforth/two-factors-auth';
Plugin required some additional setup, to make it work properly. It should be added to the resource auth resource. In our example we will add it to the user resource .
model adminuser {
  id            String     @id
  created_at    DateTime
  email         String   @unique
  role          String
  password_hash String
  secret2fa     String?
}
Then:
pnpm makemigration --name add-2fa-secret ; pnpm migrate:local
And add it to adminuser.ts
{
    table: 'adminuser',
    plugins: [
        new TwoFactorsAuthPlugin ({ twoFaSecretFieldName: 'secret2fa', timeStepWindow: 1 }),
    ],
    columns: [
        ...
        {
            name: 'secret2fa',
            showIn: { all: false },
            backendOnly: true,
        }
    ],
  }
💡 Note: Time-Step Size
By default,
timeStepWindowis set to1, which means the Two-Factor Authentication Plugin will check the current 30-second time-step, as well as one step before and after, to validate a TOTP code. This aligns with RFC 6238 best practices to accommodate slight clock drift between the server and the user's device.For example, if a code is generated between 12:00:00 and 12:00:30, it will typically expire at 12:00:30. However, with a
timeStepWindowof1, the plugin will continue to accept it up to 12:00:59 (the “next” 30-second step), preventing users from being locked out if their device clock is a few seconds off. Once the clock hits 12:01:00, that previous code will be treated as expired.If you find users frequently encountering code mismatches due to clock drift, you can increase
timeStepWindowto2. However, be cautious: larger windows can reduce overall security!❗ With a
timeStepWindowset to0, the plugin will pass all the expired codes, which is not secure and should only be used for testing purposes.
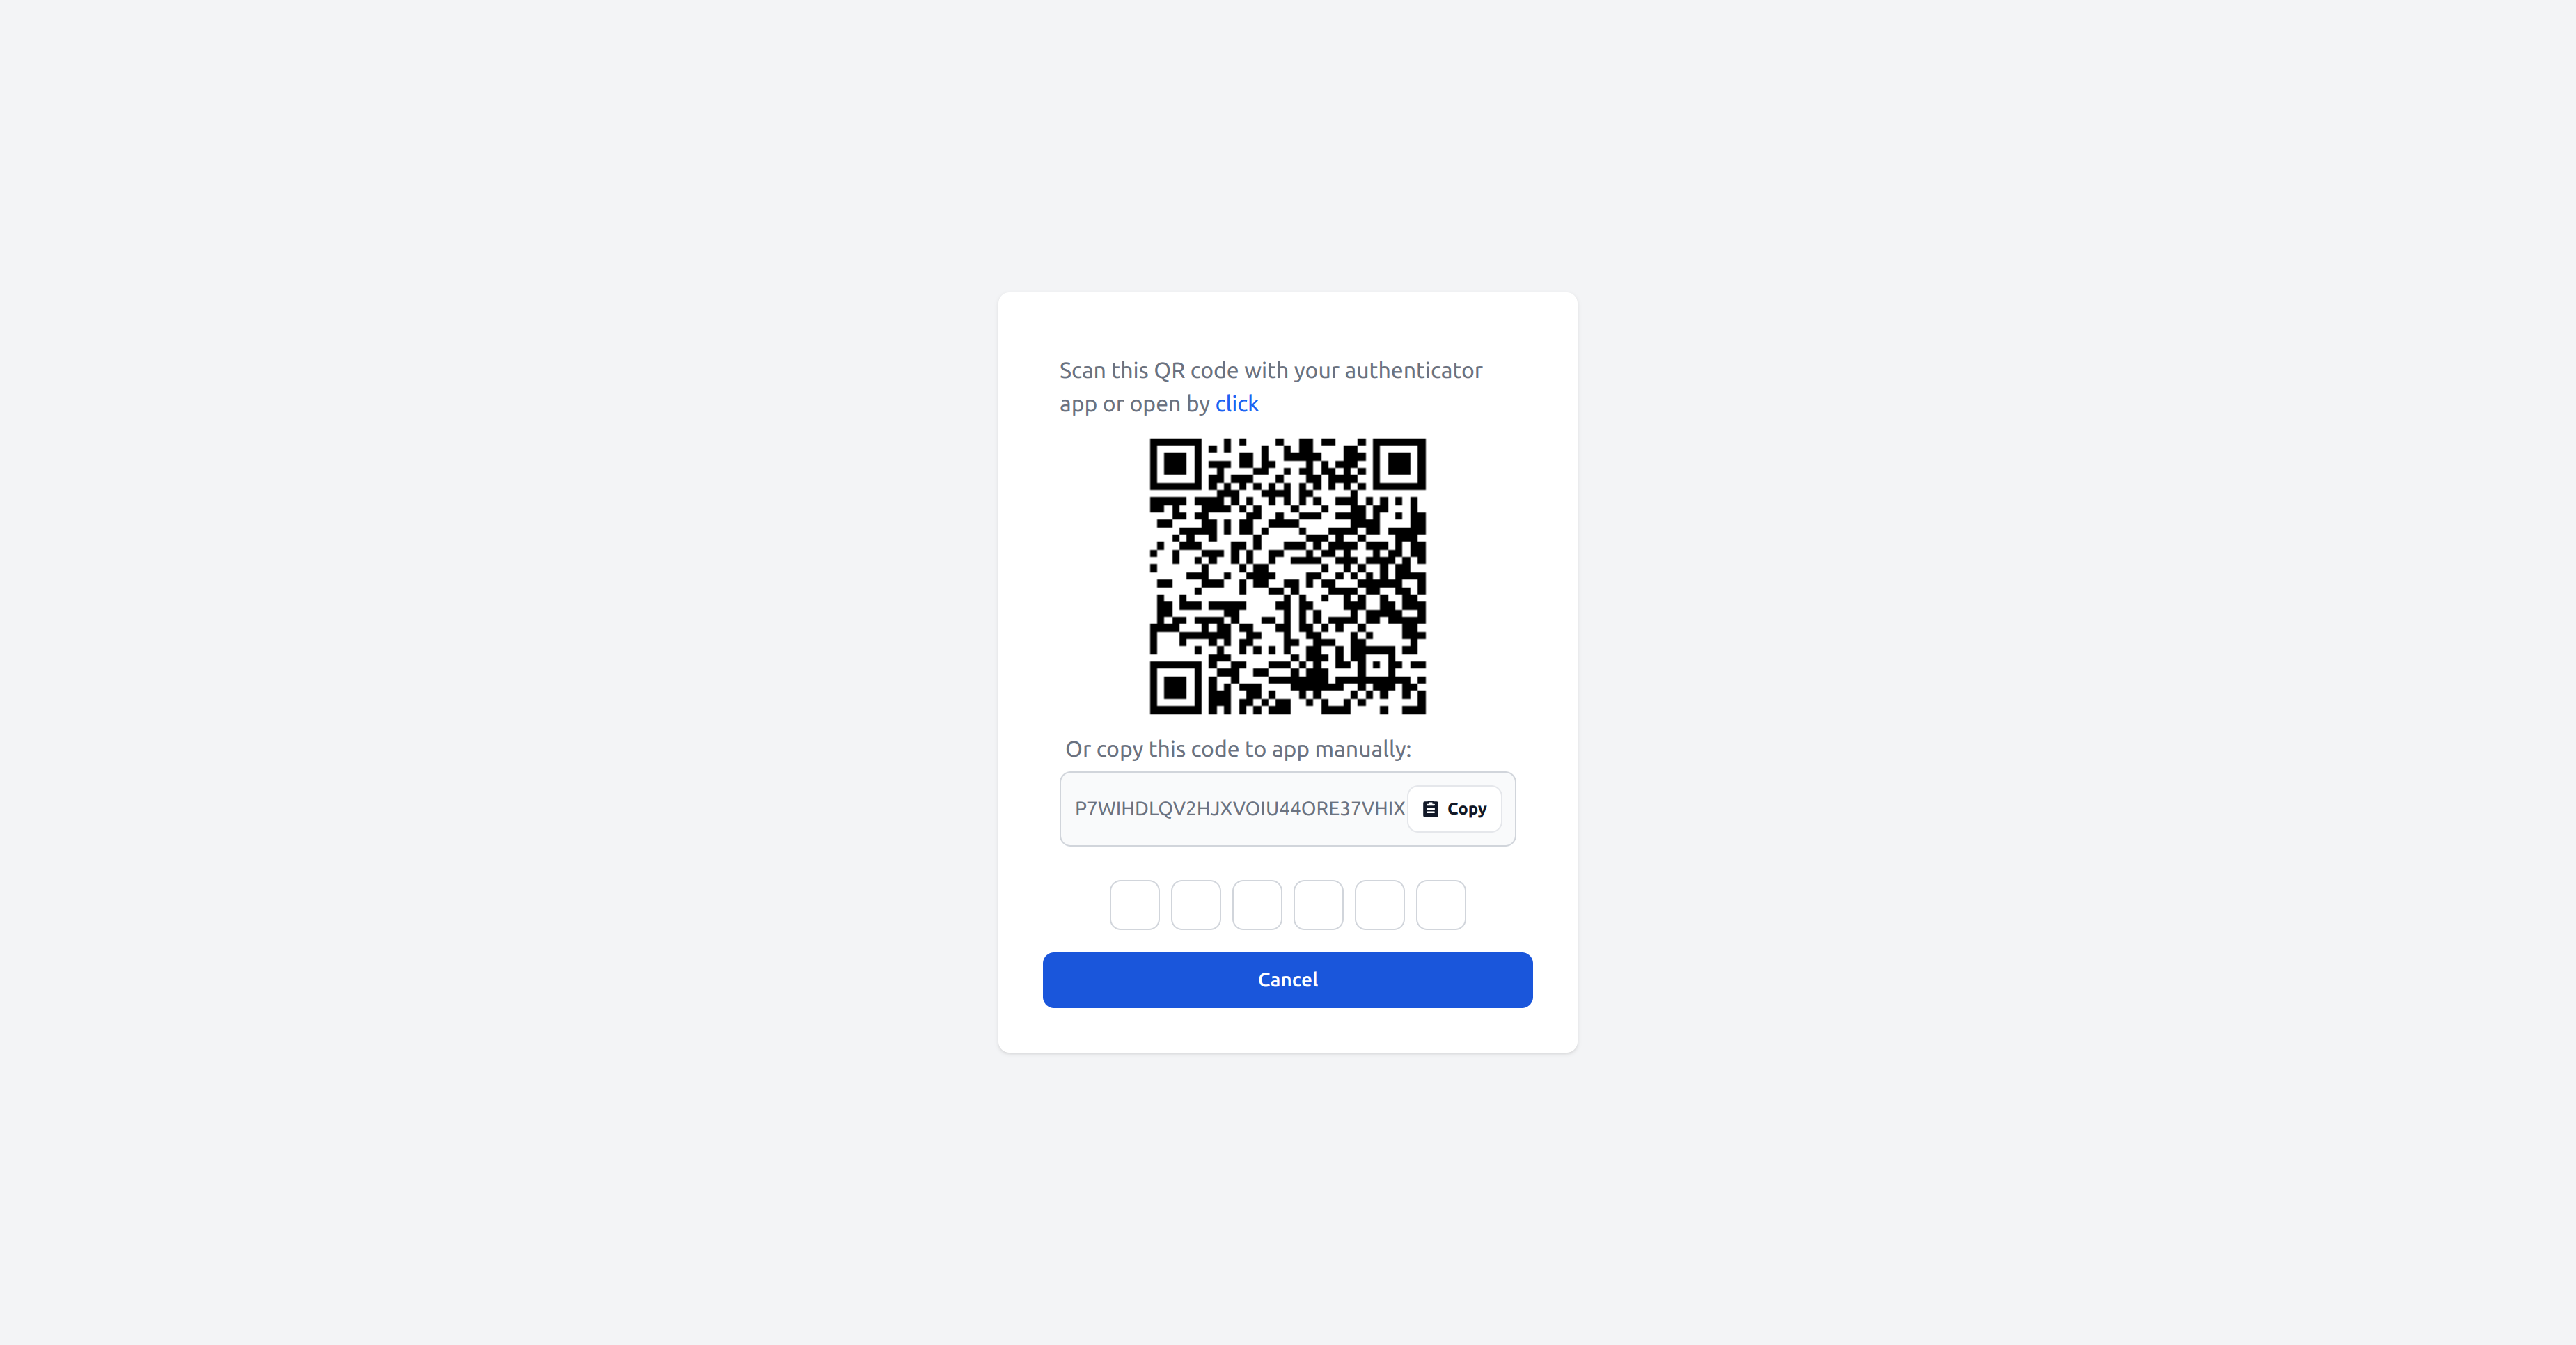
Thats it! Two-Factor Authentication is now enabled:
Disabling Two-Factor Authentication locally
If it is not convenient to enter the code every time during local development, you can disable Two-Factor Authentication for the dev environment using usersFilterToApply option:
    plugins: [
        new TwoFactorsAuthPlugin ({
          twoFaSecretFieldName: 'secret2fa',
          usersFilterToApply: (adminUser: AdminUser) => {
            // if this method returns true, 2FA will be enforced for this user, if returns false - 2FA will be disabled
            if (process.env.NODE_ENV === 'development') {
              return false;
            }
            return true;
          },
        }),
    ],
Note: you can enable it temporarey while testing two-factor authentication flow locally and then disable.
Select which users should use Two-Factor Authentication
By default plugin enforces Two-Factor Authentication for all users.
If you wish to enforce 2FA only for specific users, you can again use usersFilterToApply option:
  usersFilterToApply: (adminUser: AdminUser) => {
    // disable 2FA for users which email is 'adminforth' or 'adminguest'
    return !(['adminforth', 'adminguest'].includes(adminUser.dbUser.email));
  },
Other users (for whom this function returns false) will not be even suggested to setup 2FA and it will be not requested for them, nor on login, nor on step-up MFA requests (such requests will be automatically passed for them without any popups)
Control 2FA per-user via DB field
You can even add a boolean column to the user table to store whether the user should use 2FA or not:
In schema.prisma:
model adminuser {
  id            String     @id
  created_at    DateTime
  email         String   @unique
  role          String
  password_hash String
  secret2fa     String?
  use2fa        Boolean?  @default(false)
}
Then run:
pnpm makemigration --name add-use2fa ; pnpm migrate:local
Then in adminuser.ts:
{
    resourceId: 'adminuser',
    ...
    columns: [
        ...
        {
            name: 'use2fa',
        }
        ...
    ],
    options: {
      allowedActions: {
        delete: async ({ adminUser }: { adminUser: AdminUser }) => {
          // only superadmin can delete users
          return adminUser.dbUser.role === 'superadmin';
        },
        create: async ({ adminUser }: { adminUser: AdminUser }) => {
          // only superadmin can create users
          return adminUser.dbUser.role === 'superadmin';
        },
        edit: async ({ adminUser, meta }: { adminUser: AdminUser }) => {
          // user can modify only his own record
          const { oldRecord } = meta;
          return adminUser.dbUser.id === oldRecord.id;
        },
      }
    },
    plugins: [
        new TwoFactorsAuthPlugin ({
          twoFaSecretFieldName: 'secret2fa',
          usersFilterToApply: (adminUser: AdminUser) => {
            return adminUser.dbUser.use2fa;
          },
        }),
    ],
}
Allow Specific Users to Skip Two-Factor Authentication Setup
By default, all users are required to setup Two-Factor Authentication if it is enabled (enforced).
If you want to allow specific users to skip the 2FA setup (but still suggest it as optional possibility), you can use the usersFilterToAllowSkipSetup option:
...
plugins: [
  new TwoFactorsAuthPlugin ({
    twoFaSecretFieldName: 'secret2fa',
    ...
    usersFilterToAllowSkipSetup: (adminUser: AdminUser) => {
      // allow skip setup 2FA for users which email is 'adminforth' or 'adminguest'
      return (['adminforth', 'adminguest'].includes(adminUser.dbUser.email));
    },
  }),
],
...
So such users will have suggestion to setup 2FA, but will be able to skip it with "Skip for now" button.
Step-Up MFA (Two-Factor re-authentication on critical operations)
Request 2FA on custom Actions
You might want to to allow to call some custom critical/money related actions with additional 2FA approval. This eliminates risks caused by user cookies theft by some virous/doorway software after login.
To do it, first, create frontend custom component which wraps and intercepts click event to menu item, and in click handler do a call to window.adminforthTwoFaModal.getCode(cb?) frontend API exposed by this plugin. This is awaitable call wich shows 2FA popup and asks user to authenticate with 2nd factor (if passkey is enabled it will be suggested first, with ability to fallback to TOTP)
<template>
  <div class="contents" @click.stop.prevent="onClick">
    <slot />  <!-- render action default content - button/icon -->
  </div>
</template>

<script setup lang="ts">
  const emit = defineEmits<{ (e: 'callAction', payload?: any): void }>();
  const props = defineProps<{ disabled?: boolean; meta?: Record<string, any> }>();

  async function onClick() {
    if (props.disabled) {
      return;
    }

    const verificationResult = await window.adminforthTwoFaModal.get2FaConfirmationResult();  // this will ask user to enter code

    emit('callAction', { verificationResult }); // then we pass this verification result to action (from fronted to backend)
  }
</script>
Now we need to use verification result which we got from user on frontend, inside of backend action handler and verify that it is valid (and not expired):
options: {
  actions: [
    {
      name: 'Auto submit',
      icon: 'flowbite:play-solid',
      allowed: () => true,
      action: async ({ recordId, adminUser, adminforth, response, extra }) => {
        const verificationResult = extra?.verificationResult
        if (!verificationResult) {
          return { ok: false, error: 'No verification result provided' };
        }
        const t2fa = adminforth.getPluginByClassName<TwoFactorsAuthPlugin>('TwoFactorsAuthPlugin');
        const result = await t2fa.verify(verificationResult, {
          adminUser: adminUser,
          userPk: adminUser.pk,
          extra: extra,
        });

        if (!result?.ok) {
          return { ok: false, error: result?.error ?? 'Provided 2fa verification data is invalid' };
        }
        await adminforth
          .getPluginByClassName<AuditLogPlugin>('AuditLogPlugin')
          .logCustomAction({
            resourceId: 'aparts',
            recordId: null,
            actionId: 'visitedDashboard',
            oldData: null,
            data: { dashboard: 'main' },
            user: adminUser,
          });

          //your critical action logic

        return { ok: true, successMessage: 'Auto submitted' };
      },
      showIn: { showButton: true, showThreeDotsMenu: true, list: true },
      customComponent: '@@/RequireTwoFaGate.vue',
    },
  ],
}
Request 2FA for create/edit (secure save gating)
To protect create and edit operations, use a Save Interceptor injected on the page to gate the save with 2FA, and forward the result to the backend for verification. This avoids wrapping the Save button and works with the default UI.
Frontend (Save Interceptor component injected via pageInjections):
<script setup>
import { useAdminforth } from '@/adminforth';

const { registerSaveInterceptor } = useAdminforth();

registerSaveInterceptor(async ({ action, values, resource }) => {
  // action is 'create' or 'edit'
  const modal = (window as any)?.adminforthTwoFaModal;
  if (modal?.get2FaConfirmationResult) {
    const confirmationResult = await modal.get2FaConfirmationResult('Confirm to save changes');
    if (!confirmationResult) {
      return { ok: false, error: 'Two-factor authentication cancelled' };
    }
    // Pass data to backend; the view will forward extra.confirmationResult to meta.confirmationResult
    return { ok: true, extra: { confirmationResult } };
  }
  else {
    throw new Error('No Two-Factor Authentication modal found, please ensure you have latest version of @adminforth/two-factors-auth installed and instantiated on resource');
  }
  return { ok: false, error: 'Two-factor authentication code is required' };
});
</script>

<template></template>
Resource injection (edit/create):
options: {
  pageInjections: {
    edit: { bottom: [{ file: '@@/SaveInterceptor.vue' }] },
    create: { bottom: [{ file: '@@/SaveInterceptor.vue' }] },
  }
}
Note: You can use any injection which executes JS on a page where Save bottom is rendered, not only bottom
Backend (resource hook verification):
// Inside resource config
hooks: {
  edit: {
    beforeSave: async ({ adminUser, adminforth, response, extra }) => {
      const t2fa = adminforth.getPluginByClassName('TwoFactorsAuthPlugin');
      if (!t2fa) {
        return { ok: false, error: 'TwoFactorsAuthPlugin is not configured' };
      }

      const confirmationResult = extra?.body?.meta?.confirmationResult;
      if (!confirmationResult) {
        return { ok: false, error: 'Two-factor authentication confirmation result is missing' };
      }

      const verifyRes = await t2fa.verify(confirmationResult, {
        adminUser,
        userPk: adminUser.pk,
        extra
      });
      if (!verifyRes || 'error' in verifyRes) {
        return { ok: false, error: verifyRes?.error || 'Two-factor verification failed' };
      }
      return { ok: true };
    },
  },
  create: {
    beforeSave: async ({ adminUser, adminforth, response, extra }) => {
      const t2fa = adminforth.getPluginByClassName('TwoFactorsAuthPlugin');
      if (!t2fa) {
        return { ok: false, error: 'TwoFactorsAuthPlugin is not configured' };
      }

      const confirmationResult = extra?.body?.meta?.confirmationResult;
      if (!confirmationResult) {
        return { ok: false, error: 'Two-factor authentication confirmation result is missing' };
      }

      const verifyRes = await t2fa.verify(confirmationResult, {
        adminUser,
        userPk: adminUser.pk,
        extra
      });
      if (!verifyRes || 'error' in verifyRes) {
        return { ok: false, error: verifyRes?.error || 'Two-factor verification failed' };
      }
      return { ok: true };
    },
  },
}
This approach ensures 2FA cannot be bypassed by calling the API directly:
- The client collects verification via the Save Interceptor and forwards it under
meta.confirmationResult. - The server validates it in
beforeSavewith access toextra.cookiesand theadminUser.
Request 2FA from custom components
Imagine you have some button which does some API call
<template>
  <Button @click="callAdminAPI">Call critical API</Button>
</template>


<script setup lang="ts">
import { callApi } from '@/utils';

async function callAdminAPI() {
  const verificationResult = await window.adminforthTwoFaModal.get2FaConfirmationResult();

  const res = await callApi({
    path: '/myCriticalAction',
    method: 'POST',
    body: {
      param: 1
    },
  });
}
</script>
On backend you have simple express api
app.post(`${ADMIN_BASE_URL}/myCriticalAction`,
  admin.express.authorize(
    async (req: any, res: any) => {

      // ... your critical logic ...

      return res.json({ ok: true, successMessage: 'Action executed' });
    }
  )
);
You might want to protect this call with a second factor also. To do it, we need to make this change
<template>
  <Button @click="callAdminAPI">Call critical API</Button>
</template>


<script setup lang="ts">
import { callApi } from '@/utils';
import { useAdminforth } from '@/adminforth';

const { alert } = useAdminforth();

async function callAdminAPI() {
  const verificationResult = await window.adminforthTwoFaModal.get2FaConfirmationResult();

  const res = await callApi({
    path: '/myCriticalAction',
    method: 'POST',
    body: {
      param: 1,
      verificationResult: String(verificationResult)
    },
  });

  if (!res?.ok) {
    alert({ message: res.error, variant: 'danger' });
  }
}
</script>
And on API call we need to verify it:
app.post(`${ADMIN_BASE_URL}/myCriticalAction`,
  admin.express.authorize(
    async (req: any, res: any) => {

      const { adminUser } = req;
      const { param, verificationResult } = req.body ?? {};
      const t2fa = admin.getPluginByClassName<TwoFactorsAuthPlugin>('TwoFactorsAuthPlugin');
      const verifyRes = await t2fa.verify(verificationResult, {
        adminUser: adminUser,
        userPk: adminUser.pk,
        extra: {...req.headers, ...req.cookies, response: res},
      });
      if (!('ok' in verifyRes)) {
        return res.status(400).json({ ok: false, error: verifyRes.error || 'Verification failed' });
      }
      await admin.getPluginByClassName<AuditLogPlugin>('AuditLogPlugin').logCustomAction({
        resourceId: 'aparts',
        recordId: null,
        actionId: 'myCriticalAction',
        oldData: null,
        data: { param },
        user: adminUser,
      });

      // ... your critical logic ...

      return res.json({ ok: true, successMessage: 'Action executed' });
    }
  )
);
Step-Up Authentication Grace Period
By default, step-up authentication is required every time the user performs a critical operation.
Most of critical operation should not be often and should be carefully prefiltered. For example small money transfers should be confirmed without 2FA request (you implement it in logics), while big ones e.g. > threshold should require 2FA every time.
If it is still inconvenient for admins who perform multiple critical actions in a short period to confirm 2FA often. To reduce the issue (by lowering security level), you can enable grace period between step-up authentication requests:
    new TwoFactorsAuthPlugin ({
      twoFaSecretFieldName: 'secret2fa',
      ...
      stepUpMfaGracePeriodSeconds: 300, // 5 minutes grace period
      ...
    }),
This configuration still remembers user browser fingerprint and IP address, and if at least one of them changes, it will ask for 2FA again, ignoring grace period.
Any popups asking for 2FA would be automatically resolved during grace period without user interaction if both browser fingerprint and IP address are the same as during last successful 2FA and time since last 2FA is less than grace period.
💡** Note ** We strongly do not recommend using this feature because it increases blast radius for MitB, Cookie parsing/decoding Stealer malwares and Remote Browser Control (device controlling attacks). None of these attacks are fixed compleately by 2FA when you are not using grace period, but using grace period makes these attacks easier to perform. Instead we recommend to reducing number of critical operations requiring 2FA by carefully prefiltering them.
For example when user upgraded to Webauthn (Passkey) and uses Passkey to confirm operation, any of device-controlling attacks has blast radius of single operation only, because Passkey is used per one operation and cannot be reused later without a new user guesture, but when grace period is used, attacker might wait for user to confirm operation once and then perform multiple operations during grace period without 2FA.
💡** Interesting fact **: for those of your admins who use TOTP, even without grace period, device controlling attacks have blast radius of multiple operations, because TOTP code can be reused multiple times during its validity period (30 seconds). This plugin, even when Webauthn is activated, still allows users to confirm any action with TOTP (mainly to prevent "Lost account" scenarios), but at moment of victim device controlling attack, the negative TOTP's impact will happen only in case if admin enters TOTP code, so if admin uses Passkey at exact operation blast radius is limited to single operation only.
Custom label prefix in authenticator app
By default label prefix in Authenticator app is formed from Adminforth brandName setting which is best behaviour for most admin apps (always remember to configure brandName correctly e.g. "RoyalFinTech Admin") If you want to have custom label prefix for some reason:
  plugins: [
    new TwoFactorsAuthPlugin ({
      twoFaSecretFieldName: 'secret2fa',
        ...
      customBrandPrefix: "TechStore",
    }),
  ],
Passkeys setup (WebAuthn) alongside TOTP
If you want to use both passkeys and TOTP simultaneously, you can set them up as follows:
First, you need to create a passkeys table in your schema.prisma file:
  model passkeys {
    id                      String @id
    credential_id           String
    user_id                 String
    meta                    String
    @@index([user_id])
    @@index([credential_id])
  }
☝️Use string data type for credential_id and meta fields
And make migration:
pnpm makemigration --name add-passkeys ; pnpm migrate:local
Next, you need to create a new resource for passkeys:
  import { AdminForthDataTypes, AdminForthResourceInput } from "adminforth";
  import { randomUUID } from "crypto";

  export default {
    dataSource: 'maindb',
    table: 'passkeys',
    resourceId: 'passkeys',
    label: 'Passkeys',
    columns: [
      {
        name: 'id',
        label: 'ID',
        primaryKey: true,
        showIn: { all: false},
        fillOnCreate: () => randomUUID(),
      },
      {
        name: 'credential_id',
        label: 'Credential ID',
      },
      {
        name: 'user_id',
        label: 'User ID',
      },
      {
        name: "meta",
        type: AdminForthDataTypes.JSON,
        label: "Meta",
      }
    ],
    plugins: [],
    options: {},
  } as AdminForthResourceInput;
Add the new resource to index.ts:
    ...
  import passkeysResource from './resources/passkeys.js';
    ...

  resources: [
    ...
    passkeysResource,
    ...
  ],
To use passkey you need to use Key-Value adapter. For example:
pnpm i @adminforth/key-value-adapter-ram
Now, update the settings of the Two-Factor Authentication plugin:
  import RamKeyValueAdapter from '@adminforth/key-value-adapter-ram'

  ...

  plugins: [
    new TwoFactorsAuthPlugin ({
      keyValueAdapter: new RamKeyValueAdapter(),
      twoFaSecretFieldName: 'secret2fa',
      timeStepWindow: 1,
      passkeys: {
        credentialResourceID: "passkeys",
        credentialIdFieldName: "credential_id",
        credentialMetaFieldName: "meta",
        credentialUserIdFieldName: "user_id",
        settings: {
          expectedOrigin: "http://localhost:3500",   // important, set it to your backoffice origin (starts from scheme, no slash at the end)
          // relying party config
          rp: {
              name: "New Reality",

              // optionaly you can set expected id explicitly if you need to:
              // id: "localhost",
            },
            user: {
                nameField: "email",
                displayNameField: "email",
            },
            authenticatorSelection: {
              // impacts a way how passkey will be created
              // - platform - using browser internal authenticator (e.g. Google Chrome passkey / Google Password Manager )
              // - cross-platform - using external authenticator (e.g. Yubikey, Google Titan etc)
              // - both - plging will show both options to the user
              // Can be "platform", "cross-platform" or "both"
                authenticatorAttachment: "both",
                requireResidentKey: true,
                userVerification: "required",
            },
        },
      }
    }),
  ],
☝️ most likely you should set
passkeys.settings.expectedOriginfrom your process.env depending on your env (e.g. http://localhost:3500 for local dev, https://admin.yourproduct.com for production etc)
💡Note By default
passkeys.settings.rp.idis generated from the expectedOrigin so you don't need to set it unless you know what you are doing. Manual setting might be needed for sub-domains isolation. By default, if you set expected origin to https://localhost:3500 it will use "localhost" as rpid If you set origin to https://myadmin.myproduct.com -> it will use "myadmin.myproduct.com" as rpid
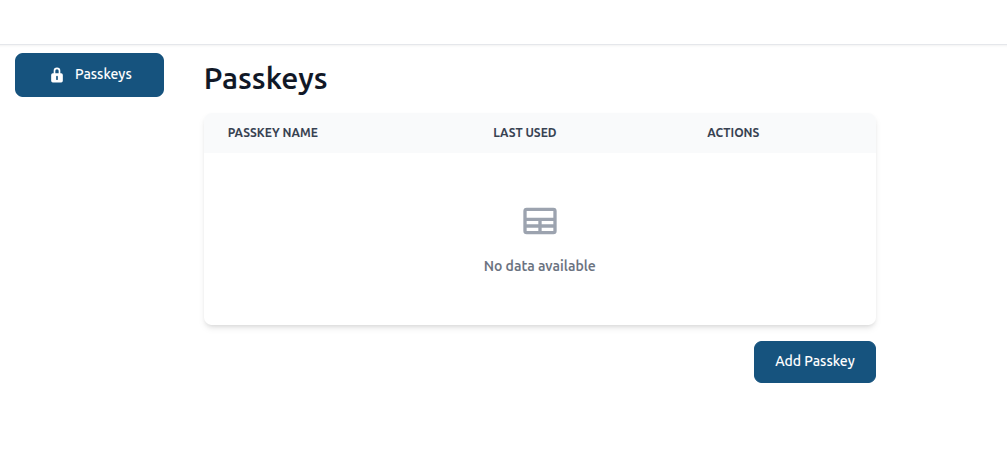
The setup is complete. To create a passkey:
- Go to the user menu
- Click settings
- Select "passkeys"

- Add passkey
After adding passkey you can use passkey, instead of TOTP:
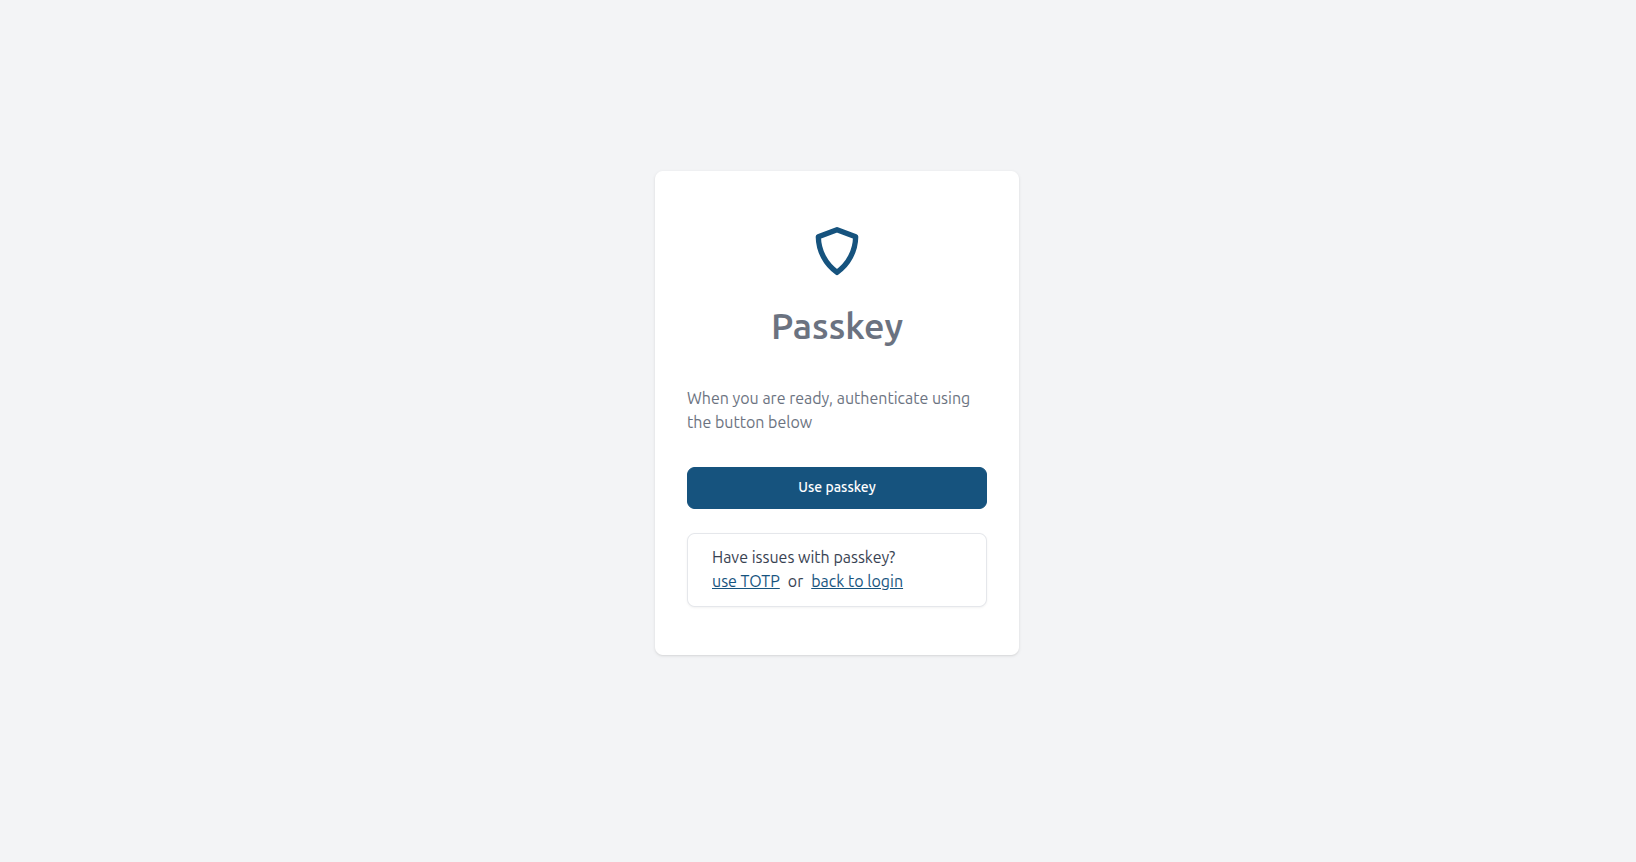
💡 Note: Adding a passkey does not remove the option to use TOTP. If you lose access to your passkey, you can log in using TOTP and reset your passkey.